After finishing my previous journal I just started a new journal, which is both an exciting and daunting prospect whenever it happens. There is so much potential in a new journal – it makes me want to crack it open and fill as many pages as possible in the first sitting. Yet opening that first blank page also makes me freeze in fear of “ruining” a perfectly good notebook with my scrawls.
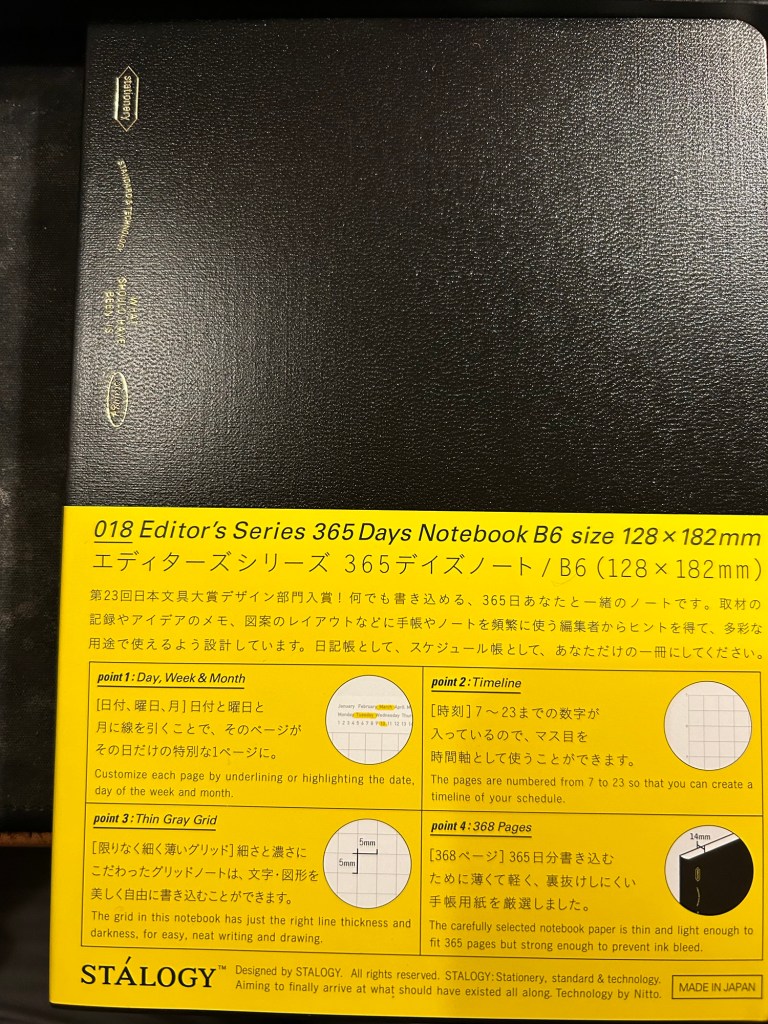
Stalogy 365 Days B6
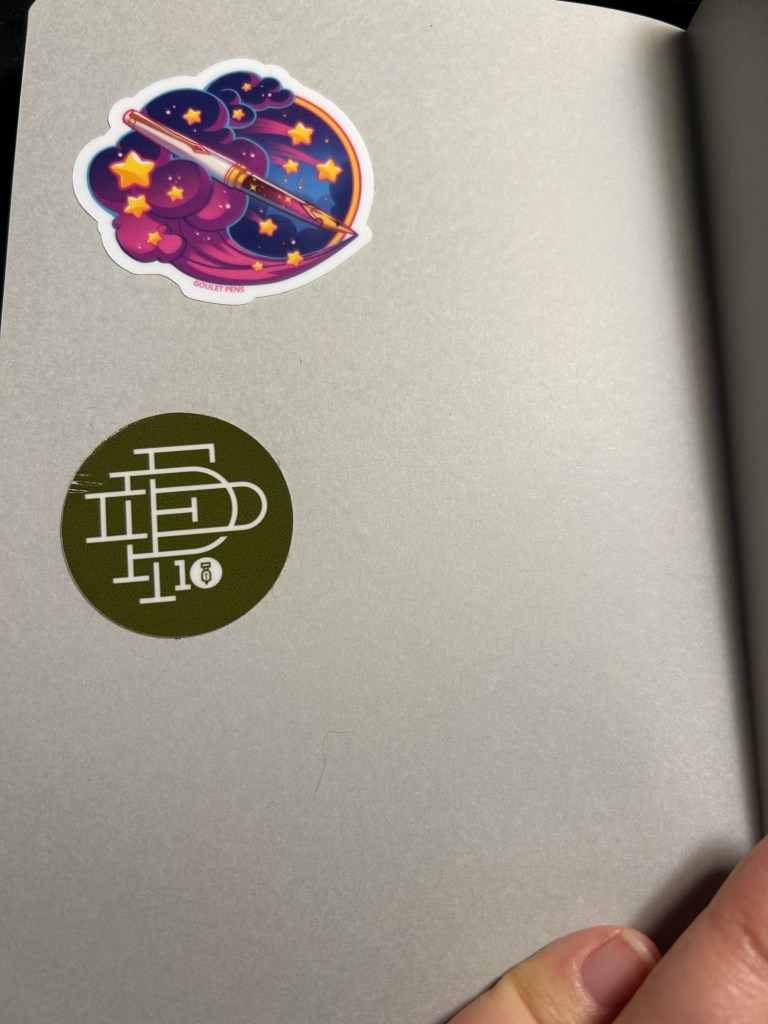
There are many tips on how to overcome that fear, ranging from deliberately destroying the first few pages to using various formulas to inspire you to fill those first pages. What I currently do is just open a new Stalogy 365 Days notebook, turn it upside down (so the header, which I don’t like, is at the bottom) and slap 2-3 stickers on the back endpages. This time I chose a 10th anniversary fountain pen day sticker and a Goulet Pens dream pen sticker to start off, but I usually add a few more stickers as I use the journal.
Stickers on the back
I then turned to the first page and started my first journal entry with the following sentence:
“New journal! My third Stalogy 365.”
After that came my usual daily gratitude list, and so I had most of the first page filled up in no time and had no problem moving on after that.
For those still in search for “new journal” inspiration, here are some pointers:
Personalize your new journal in some way. It’s about to hold your innermost thoughts, so you might as well make it your own.
Switch formats mercilessly if you find an old journaling format isn’t working for you – page size, ruling, type, etc.
Have a starting formula for your journal. If you find it difficult to start journaling each day, then pick a formula that you can use each day – like a daily gratitude list, a quote, notes about the weather, your plans for the day.
The first few entries are the hardest, but they’re also only 2-3 days out of the entire life of a journal. It’s worth remembering that and plowing through those days.
When in doubt pick a quote from a book or article you’re reading and start a discussion with the author.
If you’re really at a loss for starting ideas, use the first page, not the last one, as an ink testing page.
Do you have any new journal rituals or tips? Do you enjoy starting a new journal or find it daunting?
As I’m writing this I’m two or three pages away from finishing another journal. It’s not the first journal that I’ve finished, but somehow it’s always a tiny, little momentous occasion. After all from the moment we crack open a new notebook and dare to write on its pristine pages we envision this outcome: a notebook chock full of words, sketches and mementos.
Slightly frayed and ink stained but this Stalogy 365Days B6 notebook has served me well for about 6 months
For me the end of a journal offers a change to review and reflect on its contents. The last few pages aren’t used for normal journaling, but rather are reserved for me to write notes in as I leaf through the completed journal’s pages. What key moments does it hold? What revelations? How can I look back with kindness at moments of weakness or failure, and how can I learn and grow from them? This is not always a pleasant or easy experience, but I have always found it worthwhile.
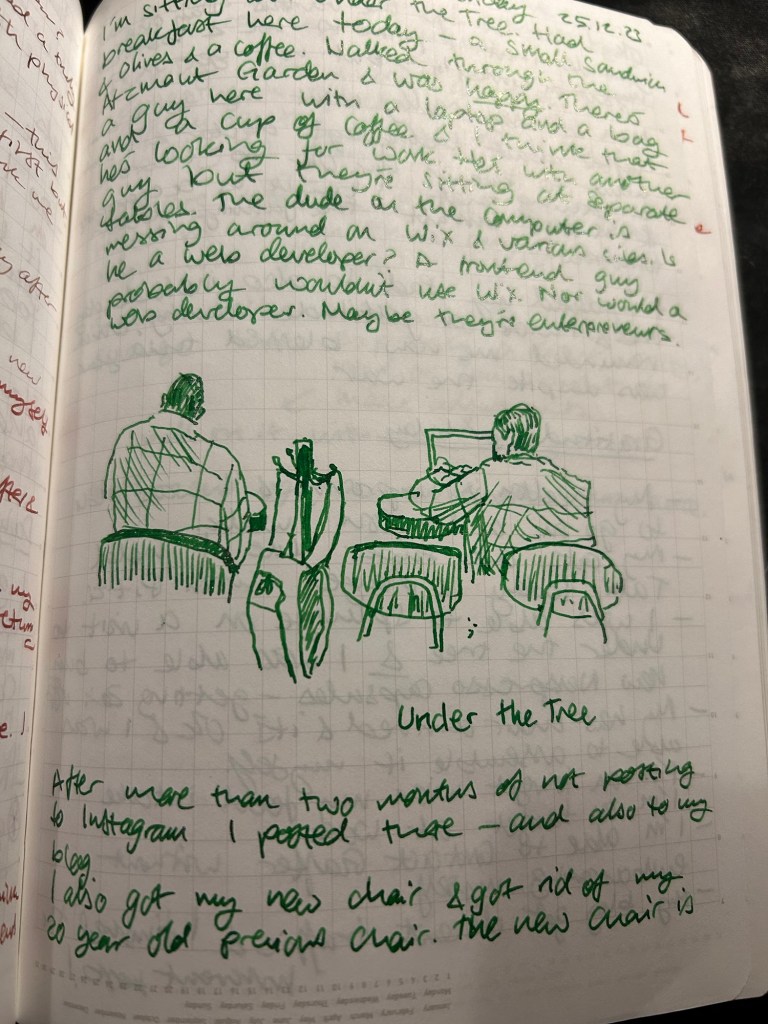
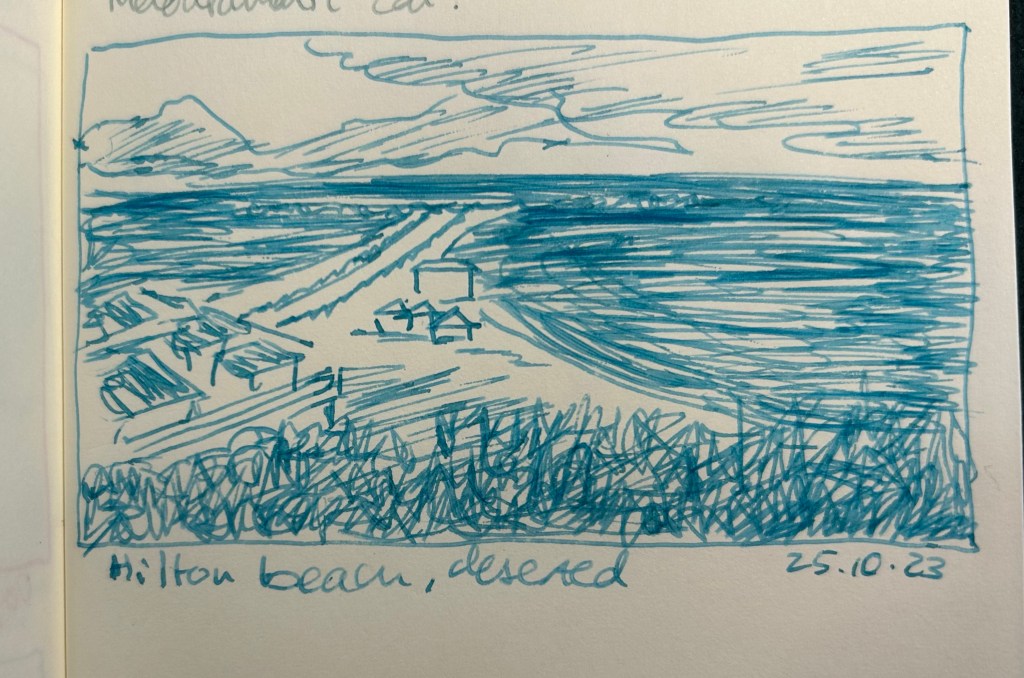
Sample page with a sketch.
This is also a time when I consider whether I need to switch a journal format or not. I’ve been using the Stalogy Editor’s Series 365Days B6 notebook for the past two journals and I’ve been happy with it, so that’s what I’ll continue using for now.
What about you? Do you have any “end of journal” or “end of notebook” habits and rituals?
I’ve been spending practically every day for the past week or so with my dad in hospital.
There’s this phenomena that when you most need journaling, the it will help you the most, you find yourself least able to do it.
Hospitals are journaling hostile environments. There are no tables to use, there’s constant noise and distractions, there’s zero privacy and you never know when the staff will pop into the room with something. Whether you yourself are hospitalized or you’re there with someone else, there’s very little opportunity to crack open your journal and start writing.
Hospitals are also where weird, interesting, scary and new things happen, so you generally do what to write about them, to process them on paper. Fo instance, today three policemen escorted a prisoner into the heart surgery department. It wasn’t something I ever expected to see, a sort of non-sequitur that took me a minute or two to process.
The solution is to take temporary notes on your phone, put a reminder for an appointment with your journal in the evening or when things quiet down around you.
If you’re the one hospitalized, try to journal two or three times a day, documenting what’s going on, how you’re feeling, what the staff said, who visited you, etc. The best time to journal is during the nursing staff shift changes, because that’s when nobody will bother you.
Journaling is like running – oftentimes it’s really hard to start, but I haven’t regretted a run or a journaling session yet.
At night you can escape to these empty spaces and write
I had a phone call with an old friend today, and he asked me what I do to stay sane these days. I told him that I’m back to my chemo routine:
Wake up in the morning, take care of my cats and my plants.
Do some form of physical activity: run, gym, Nike Training Club workout, walk, something. This is non-negotiable since without it I get very depressed very quickly.
Work as best as I can.
Have a conversation with at least one friend. Messaging and emails don’t count — phone calls, zoom calls, face to face only. Yes, it makes a difference. I hate making phone calls too — it’s still worth it.
Talk to my family as much as possible.
Cuddle my cats. They’re very cuddly, and it helps. The little one in particular is velcro.
Journal, at least two times a day (morning and evening). These days I go for a midday session too. Write what’s going on and what I’m feeling to process it.
Read. It’s always been a comfort to me, and while most people can’t read during treatments and many can’t bring themselves to read anything but the news now, I’ve always found comfort in books.
Build Lego every night. It’s the best meditation ever. You can’t feel scared while building Lego. Your mind can’t race while building Lego. There’s only the Lego. And in the end you have something cool in your hands that you’ve built.
I last posted about my planner and to do list setup here. To recap, my planning system includes two large Moleskine hard cover squared notebooks, one in which I plan my week, and one in which I use as a daily to do planner. I started using this setup once Covid hit and I started working from home. It worked very well for a year and a half.
I was hospitalized for a month, in which I discovered that I have zero control over my time or how my day will shape out. When I got out I was already on a Chemo regiment. I had to make adjustments to my life, this time because of my personal health, not a global pandemic.
Score (another) one for self-made planners.
My old system was generic enough that it fit into my new lifestyle with very little adjustment. The weekly notebook stayed mostly the same, as you can see below. The main difference is that I manage less stuff there and more using reminders in Fantastical. It’s not that I don’t like paper planners any more, it’s just that Chemo Brain is a possible side effect of my treatment and I don’t want to risk not getting something important done because I forgot to check my weekly planner at the right moment, or I saw something there but didn’t remember it after I’ve seen it.
So why keep the weekly planner at all? Because it helps me see how the week is shaping up, and because it allows me to do a little long term planning, despite everything. All my plans at the moment are in two week batches (dictated by my chemo regiment), and this layout allows me to manage them.
Another addition to this notebook is a few tracker pages, marked by tabs. Some track purchases that I’m waiting for, some track bureaucracies that I need to take care of, others list things that I want to get done eventually but I haven’t decided yet when or how.
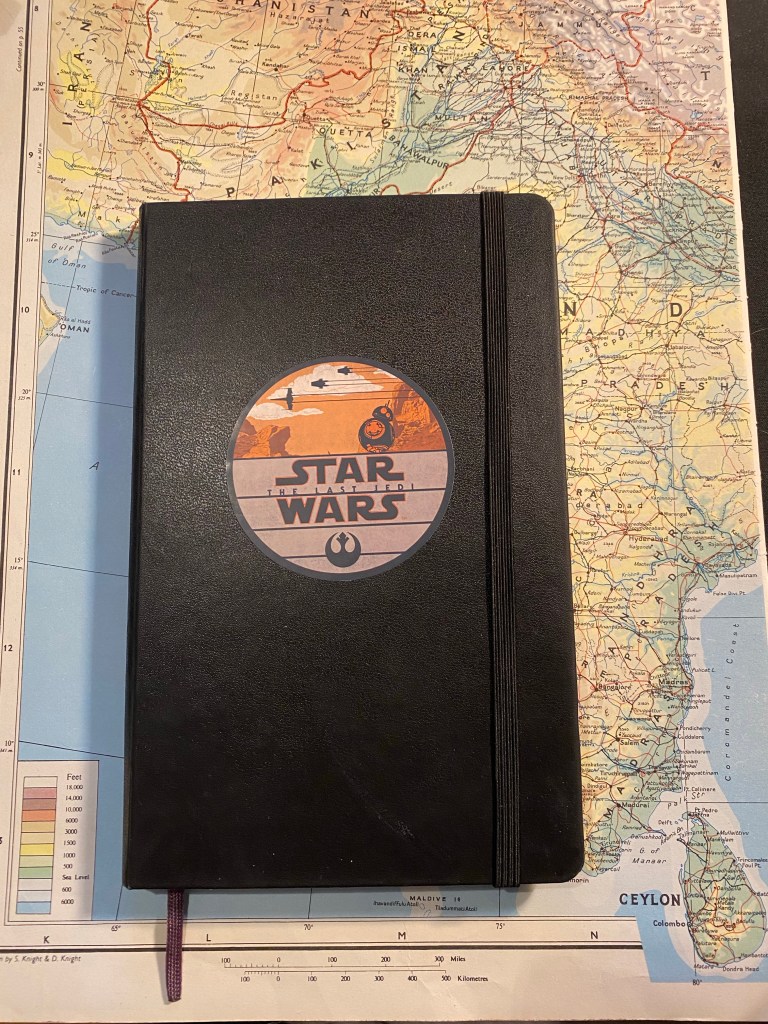
As for my daily planner notebook, I just finished one and started another. Here’s the finished notebook:
Moleskine Large Hardcover squared with a Star Wars The Last Jedi decal on the cover.
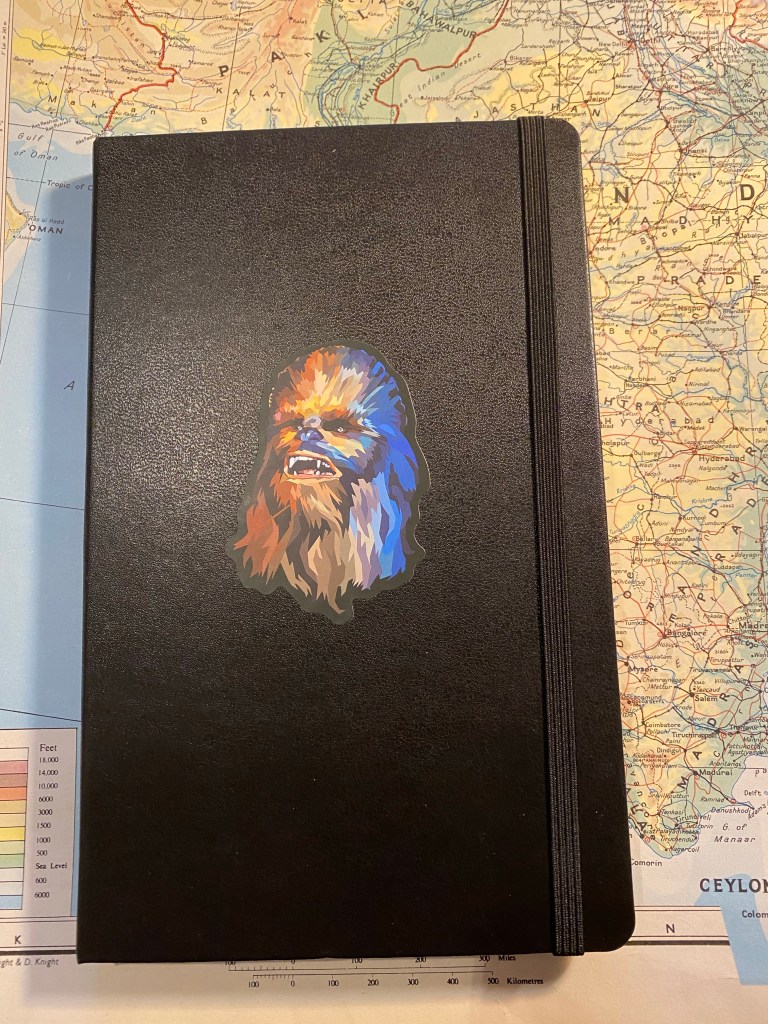
Here’s the new notebook. I love using these decals to make these notebooks my own:
Moleskine Large Hardcover squared with a Star Wars Chewbacca decal on the cover.
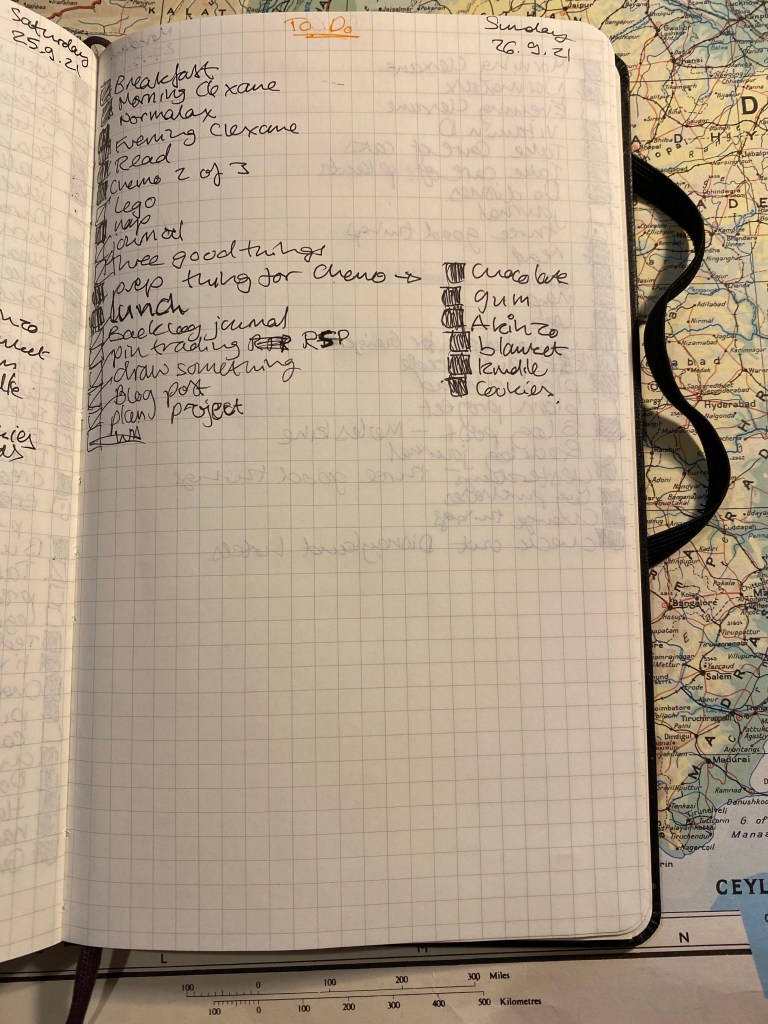
I used to manage every day on a full spread, with personal to dos on one side of the page and professional ones on a another. Since my life is less busy now than it used to be, I’ve downsized my to do to one page per day, with personal and professional mixed in (I work from home). This is a sample of my least busiest day: it’s a chemo day and I wasn’t planning on working after this treatment since it was a long one. Door to door I was in the hospital from 6:40 to 14:00, and completely wiped out after it. I don’t usually list my meals or naps in my notebook, but chemo days are so crazy (in terms of what my brain does on steroids) that I have to write everything down. Things that I didn’t do get a strike in them and are moved forward to another day.
Everybody has different needs from their planner, and those needs oftentimes change unexpectedly, and out of sync with “planner season”. It’s one of the reasons why I find making your own planner, working just a few days or a week or two ahead is the best and most consistent way for me to manage my time. There are some great planning systems out there, but if you’ve struggled with using them, or if your circumstances make you need a very flexible system, I highly recommend picking up a squared or lined notebook and creating your own.
When Covid-19 hit last year and I started working from home my old task management system completely disintegrated. It was a combination of trying to find a new work/life/health balance, coupled with starting a new job that really made me aware that my old running daily work checklist and home checklist were no longer going to work. I was also keenly aware that I could no longer do any long term planning, and yet that I had to find a way to plan ahead somehow, or I’d accomplish none of my long term goals. After trying several systems with little to no success, it took until January 2021 for me to find a system that worked for me. In the hopes that this may help someone build out their own system, here is a glimpse into mine.
The system is built into two separate Moleskine Large Hardcover Squared notebooks. This was my notebook of choice for my previous system, and it has served me well. I don’t use fountain pens for my planning, just fine gel pens, and I don’t mind the ghosting, as I find that it’s more pronounced in photos than it is when I actually use the page. One notebook is my weekly planner, and I reference it about once or twice a day. The other notebook is my daily task list, and I reference and update it all the time. Why two notebooks and not one notebook with both a weekly plan and daily pages? I tried that and the need to constantly flip between pages with no ability to see my weekly plan before me as I create my daily task lists was too much for me to deal with. I don’t have a dearth of notebooks and I do have dearth of time and attention, so two notebooks it is.
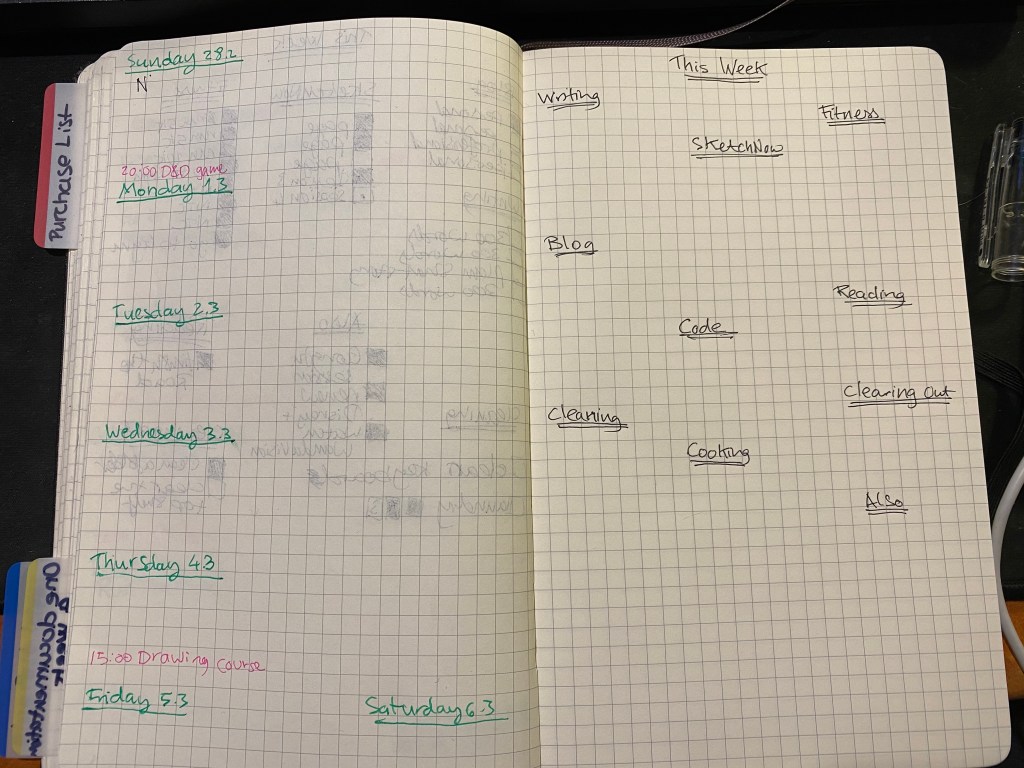
Here’s a weekly notebook spread:
Weekly notebook spread, before filling.
Each spread in my weekly notebook is divided between my weekly schedule/plan on the the left hand side of the spread, and a weekly goal list on the right hand side. This is a sample of the following week’s spread before I start really filling it. On the left hand side I fill in the days of the week and the dates. I put in appointments and things that I need to take into account while doing my planning, but this page isn’t a replacement for my Fantastical calendar. I still want and heavily use a digital calendar with reminders, but this notebook page is crucial for my ability to see and plan ahead. I plan and think better on paper, and so if I have a D&D game on a certain day, I know that I need to schedule time to prep for it. This is also where I plan my weekly training: when I run, when I go to the gym and when I rest. I also use it to plan ahead things that I need to be aware of for my mother’s various doctor’s appointments, from reminders, to various forms that need to be filled, blood tests scheduled etc.
The right side of the page is the most important part of each spread, as it is where I plan out what I want to get done each week. My yearly goals are broken down and mapped out week by week here. I break the goals down by title, and then write down 2-3 related goals under each one (except the fitness goal which gets more). Some goal groups are consistent – fitness, reading, writing, blog, cleaning. Other goal groups change depending on the week and my focus. The “Also” goal group is for miscellany, such as watching a weekly episode of a show that I don’t want spoiled, or renewing/cancelling subscriptions.
The daily notebook is much simpler, and is merely an evolution of my old task system, adapted to working from home:
Daily task list, in the afternoon of the day it was created.
On the left side of every work day there is a professional task list, with work related things that I want to do that day. On the right side of the page is the personal task list, with stuff that I want to do before and after work. On weekends the two sides of the page simply both list out personal tasks. This system is clear, simple to use, flexible and doesn’t require a lot of “meta” effort to set up or maintain.
If you’re struggling with time management lately, take some time to create a system that works for you and doesn’t overwhelm you. I highly recommend not using a planner but rather creating your own schedule, since it saves you from the disappointment and stress of empty planner pages. It also allows you to add specific pages to your setup as the need arises. For instance, as global shipping and our local post office have gone haywire since Covid, I dedicated a spread in my weekly notebook to tracking various shipments. When I need to go to the post office to collect a package I note it down in my schedule, and so it was easy for me to use a different page on the same notebook to track the status of each package.
Let me know if this was helpful, and if you’ve also been forced to revamp your planning over the past year.
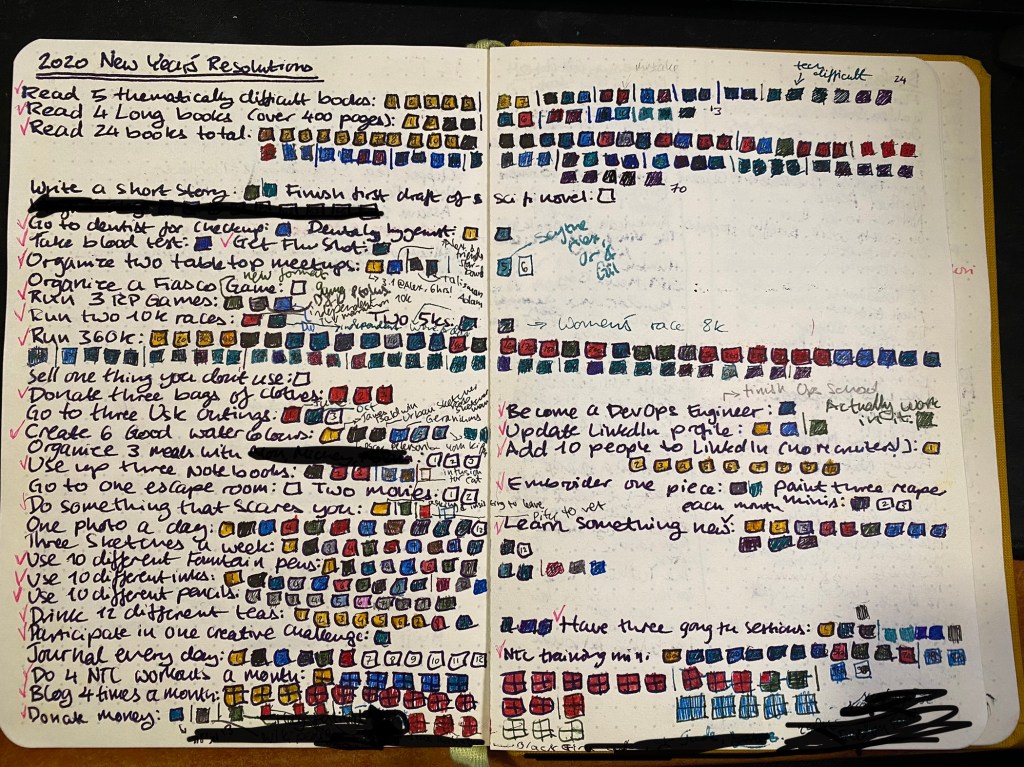
2020 was a pretty terrible year for most people, which is why I debated whether to even go over my 2020 goals or just talk about my 2021 ones. In the end I decided to talk about them, because 2020 really stress tested my system of yearly goals/resolutions.
At around March I thought that I’d have to trash the whole thing, as we went into our first lockdown of the year. My travel plans were cancelled. Any option to meet friends went out the door. My plans to change careers were at risk. I couldn’t even run, because the first lockdown involved extremely strict rules and the police were constantly around my house, yelling at people to go home and fining people. My writing was on the rocks, my drawing course was cancelled, and for the first time in my life I spent Passover alone.
How 2020 looked like.
After some debate I reminded myself that my goals were built with failsafes in mind, since my 2018 annus horribilis, and so I had a chance of completing most of them, even if I’d miss any “stretch goals” that I had in mind. The basic goals were there to keep me focused, motivated and moving in the right direction. In the end they worked. The got me working out when I couldn’t run, running in circles (literally) when I could only move in a 500 meter radius from my house. They got me to keep on reading, keep on writing (not as much as I would have liked, but I’ll take it), and to dare to make the career change that I promised myself.
I hit most of my basic goals, missed a few completely, and got a few more partially. Yet the point of this post isn’t to brag, as my year could have shaped out worse than it had. The point is that I would have given up on myself if I didn’t have a plan that I thought that I had a fighting chance to accomplish, given the circumstances. I couldn’t participate in any races, but I enrolled and ran in several virtual races. Races keep me motivated to run, and running makes me feel better and gets me out of the house. I couldn’t go the gym, but I could do NTC workouts at home, so I had a chance to get that in. Reading provided me with an escape, and my reading goals and reading journal provided me with motivation to read, and to read books that were challenging as well books that were comforting. I couldn’t meet up with friends to play tabletop and RPG games, but thanks to Discord, Steam and Zoom we could still play together.
All of these things required extra effort in a year that really did its best to convince me that it would be a good idea to give up in advance and write the year off. The infrastructure that my goals provided kept me on track, and helped me salvage something of this terrible year. They also taught me how to structure my goals for 2021 better, but more on that in a separate post.
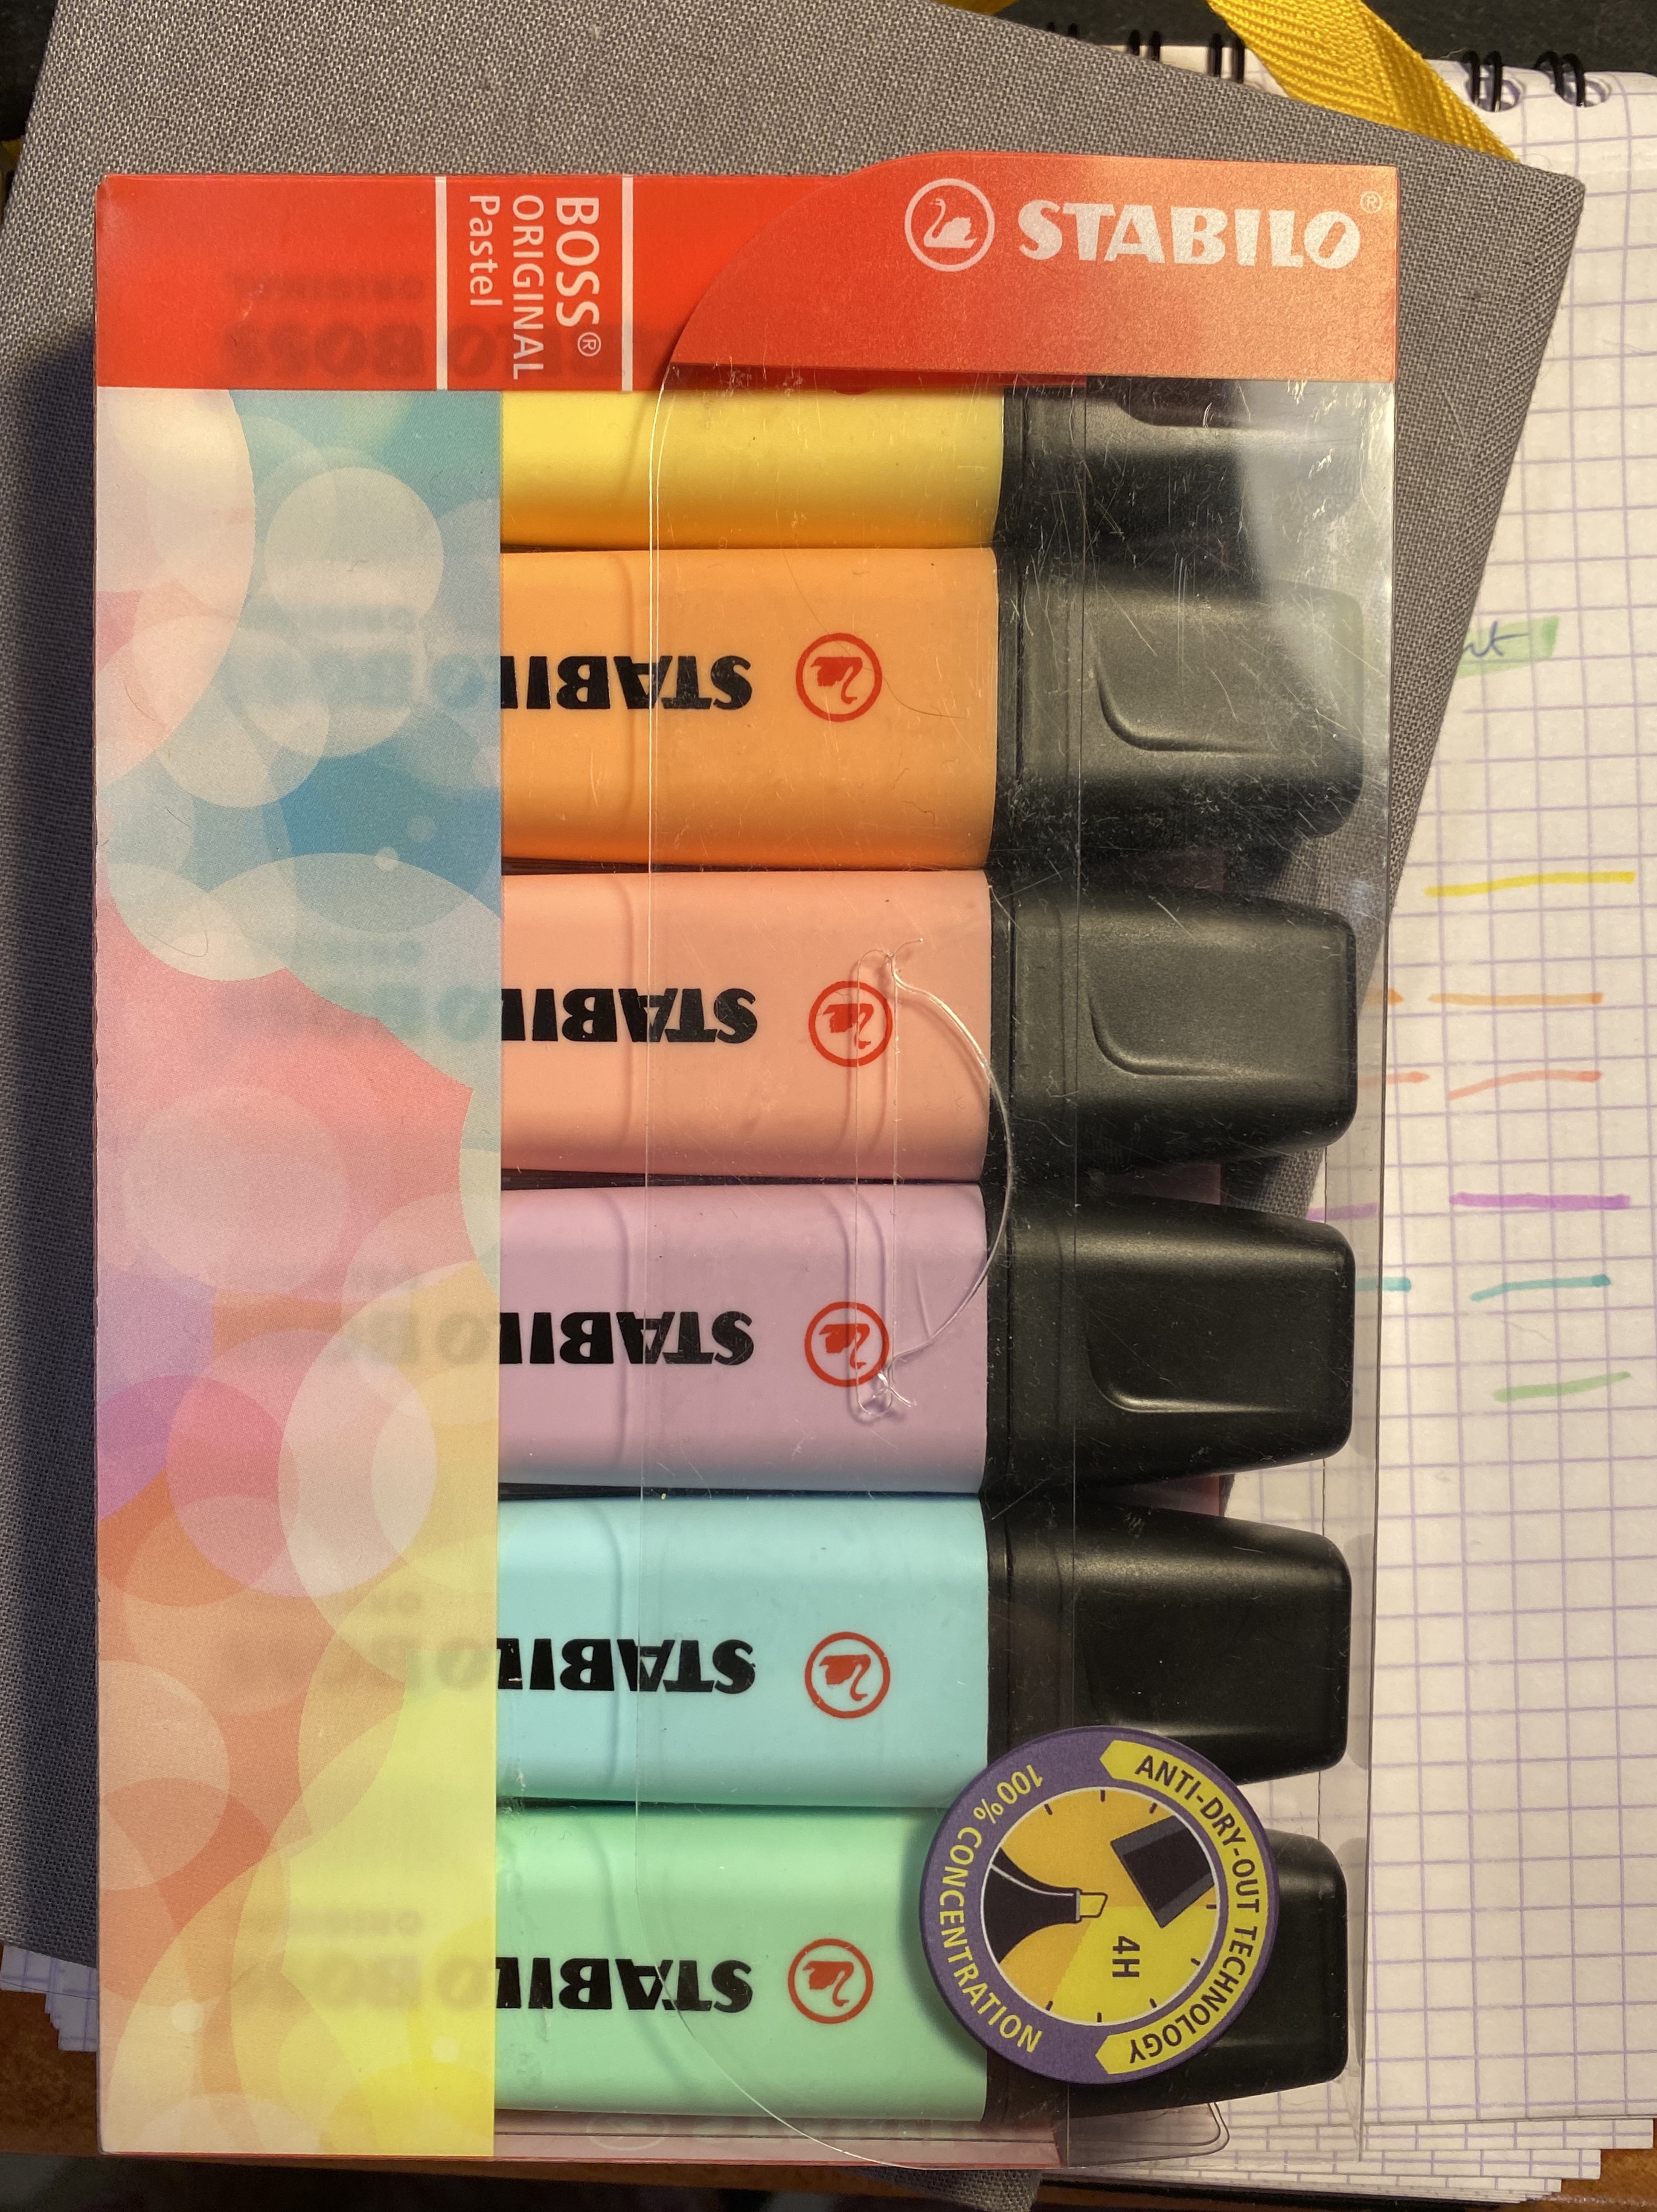
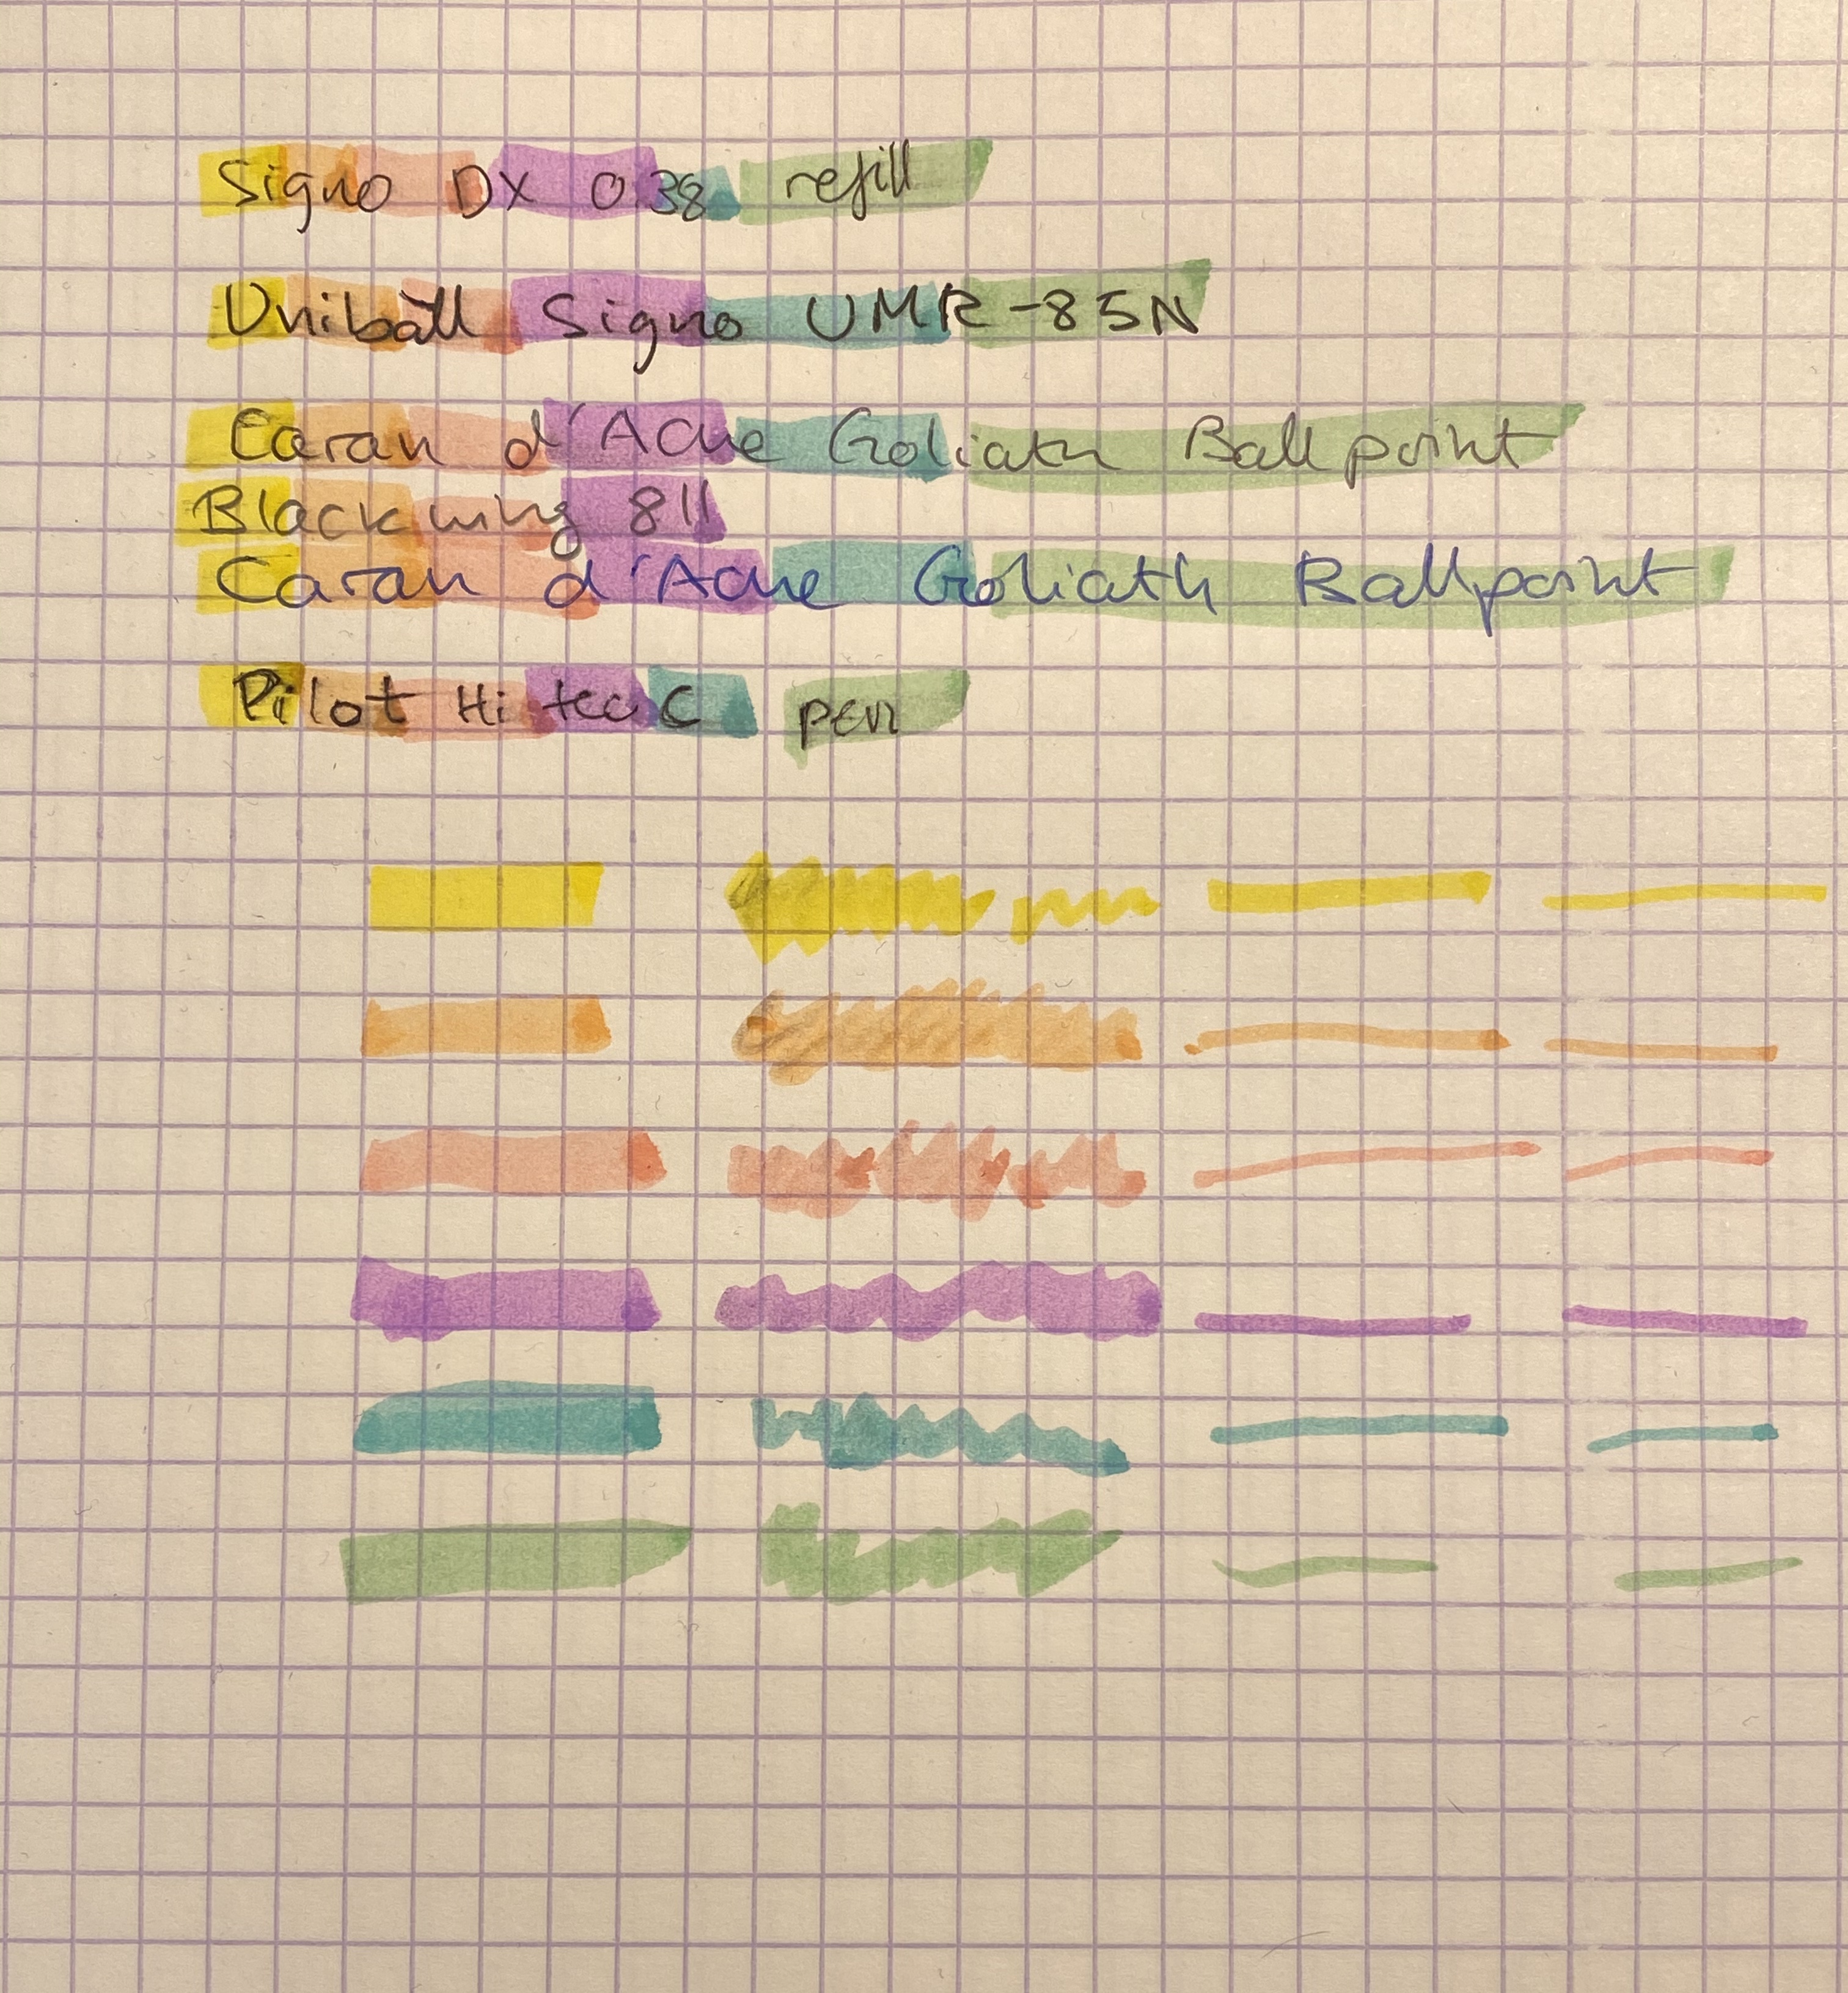
There’s something about multi-coloured sets of stationery items that I just find irresistible to the point where I bought an entire set of Stabilo Boss Pastel highlighters even though I hardly ever use highlighters.
These were on sale. It hardly justifies me buying them.
I think highlighters are one of the quintessential back to school items, as you’re likely to use them most when you’re revising or reading and taking notes for a class. I used to use highlighters extensively, in the “bad old days” when Stabilo Boss were the only decent highlighters around. They are now bested in every possible way but price (and even that depends where) by their Japanese counterparts, with their sophisticated windows, double-sided tips, brush tips and weird double line producing tips. Even when it comes to colour choice the old Stabilo Boss gets left behind.
The strange mottling you see is because these lay down so much terrible ink.
The Stabilo Boss highlighters are likely what you’ll find in the office (when you actually go there, Covid permitted). If you can get your office to purchase the pastel version of these I highly recommend it as they are less searing on the eyes than their standard fluorescent brethren. Otherwise these have a chunky pen body that’s pretty comfortable to hold, especially if you’re a kid, and truly terrible ink. It’s much too wet, and tends to bleed through practically every kind of paper that you’ll find in a normal office setting, and most of the high quality stuff too. My main use for them has been as colouring markers to give to the kids my colleagues sometimes bring to work. I draw colouring pages with a sign pen, and if the parents didn’t bring coloured pencils or markers with them, the Stabilo Boss markers do in a pinch.
Even on relatively thick Baron Fig Confidant paper these manage to bleed and show through.
As for actual highlighting, these do a terrible job. They smudge anything but ballpoint, they bleed through like terrible, and the colours are decent but not very exciting. Note that these pick up ink and retain it pretty well, which gives the classic “dirty highlighter” effect, especially on the lighter coloured ones.
Highlighter testing on Rhodia paper, which you’ll probably not have access to at work.
So if you’re looking for a highlighter, look elsewhere, there are much better choices on the market. I’m not going to even deign to test Stabilo’s claim that these still work after being left uncapped for 4 hours. It’s more important that the actual highlighter is good and useful than that it wins in a highlighter survival contest that has little to do with their standard everyday use.
Now to the notes on highlighting: on the second semester of my first year as an undergraduate I had a professor who actually took the time to teach us how to take notes and revise. He had an acerbic sense of humour and a great dislike of highlighters. “If you want to highlight something, only use a pencil, or at the most a pen, to underline it. Never use highlighters, because then when you read back your eyes will only see the highlighters, and if you’ve misunderstood something, or appropriated too much importance to a sentence or passage you have little chance to ever correct it. Underlining with something that doesn’t immediately jump out to you lets you see things in context, and reevaluate them if necessary”.
I tried his advice out and I found out that it worked well for me, and so I’ve been underlining and not highlighting ever since.
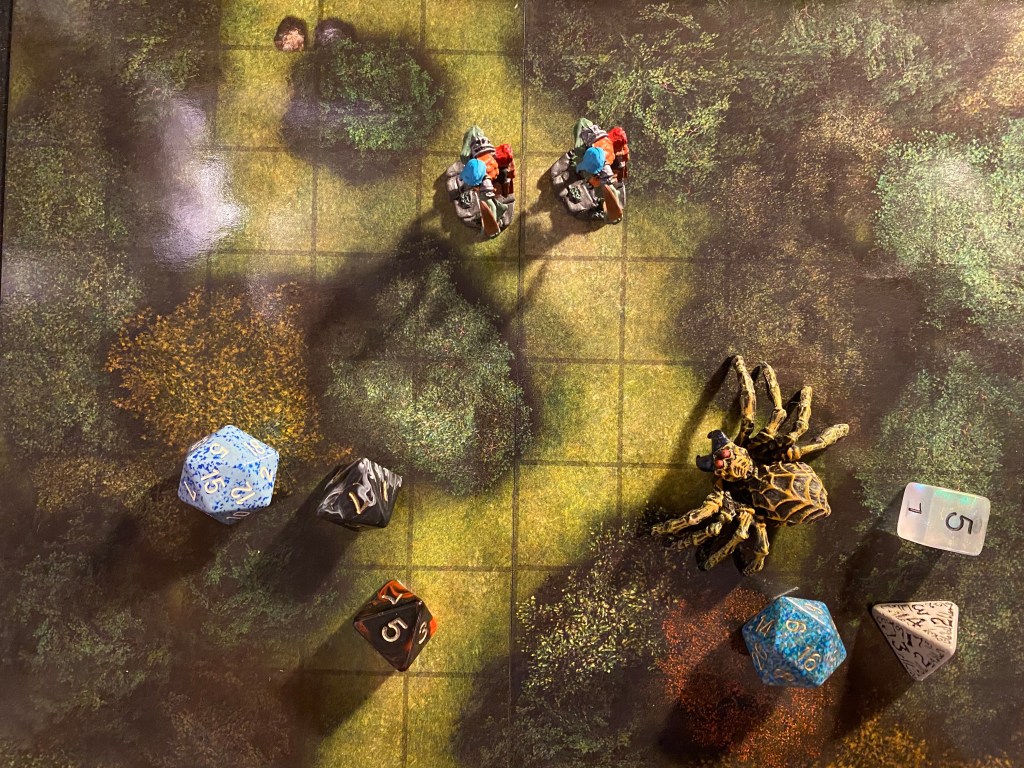
So I’ve been drafted today to run a new roleplaying game for three players over Discord. Two of the players are experienced, one of the players is completely new to roleplaying games. After a bit of debate we settled on Dungeon World as our system. As an aside I’ll say that I highly recommend Dungeon World both for newcomers to roleplaying, and to GMs and players who are short on time. It’s a phenomenal system which lets you get to do a lot of cool stuff fast, and allows you to have a character that is fun and functional from level 1.
The challenge with this adventure is that I need to create something fast, so that we can have our first session sometime next week, and something that’s appealing and accessible to players with vastly different experience levels. Also, I actually need to have fun running it.
I’m also running the second session of a very dense urban D&D 5E campaign tomorrow. It’s a game that is challenging to run particularly in terms of tracking the vast and complicated cast of characters, and the various locations the game can unfold in.
So I thought that I’d write a few posts on the various tools that I use to plan, organize and track my games. What I use changes based on the game, and also based on how happy I am with the results I previously had with it. I’ve been DMing and GMing for 17 years now, and during that time I’ve tried out a lot of tools and approaches to handing the “backstage” parts of roleplaying games.
A few words about Covid: my main RP group moved to playing over Discord a few years ago, when one of the players moved abroad and we wanted to keep on playing together. We started out in Google Hangouts before Google did terrible business-y like things to it, and then we moved to Discord, which has been our home for a good long while. Due to Covid a lot of groups have now been forced to make that same move or else forgo playing at all, and the internet has exploded in the past few months with a lot of resources for running online games successfully. A lot of these resources are very helpful, but a lot of them also just add “noise” and added pressure to the already tough job of being a DM/GM. If you are running a game for an online group, whether it’s your first game or not, don’t feel the pressure to run a game at the level of production that you see on various podcasts/twitch/YouTube channels. You don’t have a production budget, you don’t have a production team, and here’s the thing: your players aren’t expecting that. They just want to get together and have fun for a few hours. Prep as you would for a face to face game, with a little added attention to images that you can send in the chat (monsters, NPCs, maps, etc), and make sure that you have video on, or the players will miss a lot of nuance in your body language. Keep it simple and add complexity only if needed, later on. I recommend using Discord with the Sidekick and DiceParser bots (you want two as a backup, because eventually one of them will lag or break), and Google Docs/Dropbox to share sheets and information between sessions. If you’re playing D&D 5e then I highly recommend managing the character sheets on D&D beyond, and gradually learning to use the Avrae bot in your game (it’s got a lot of commands, so don’t sweat it if you don’t start running all your combat scenes with it from the first session on). If you need a mapping resource, here’s a free, open-source browser based tool called mipui that one of the former players in our game made. It’s very simple to use, and it works just fine for D&D games. I recommend using it in Chrome. Remember that technology has a tendency to break and jitter, and be patient.
If you’re someone that’s always wanted to play but never had a group, now is your golden age. Tons of new groups are forming up using Facebook, Reddit and Discord to find new players.
This post came out longer than I expected, so I’ll go an brainstorm and plan for my games, and I hope that you find your people and start gaming too. There’s nothing like RPGs to bring a group people together for a few hours of blissful, harmless fun.
I’ve been catching up on the Pen Addict members-only “Friend of the Show” podcast (highly recommended), and person after person said that they prefer modern pens, and they have a vintage pen, an Esterbrook, which they don’t really use. That people’s first vintage pen is an Esterbrook didn’t surprise me, as it’s a great little pen at a very compelling price, and it can be easily modified to suit your writing style by swapping out the nib. What did surprise me a little is that people aren’t really using the Esterbrooks that they have.
Then again, I own five Esterbrook pens:
Yet I haven’t used them in years. They all have nibs that I carefully selected to fit my writing style perfectly, and still I haven’t used any of them since 2016 or so. And the reason I don’t use them is the reason why I’m going to suggest to people starting out with vintage pens to maybe not pick the Esterbrook as their first vintage pen, ubiquitous and cheap and beautiful as they may be.
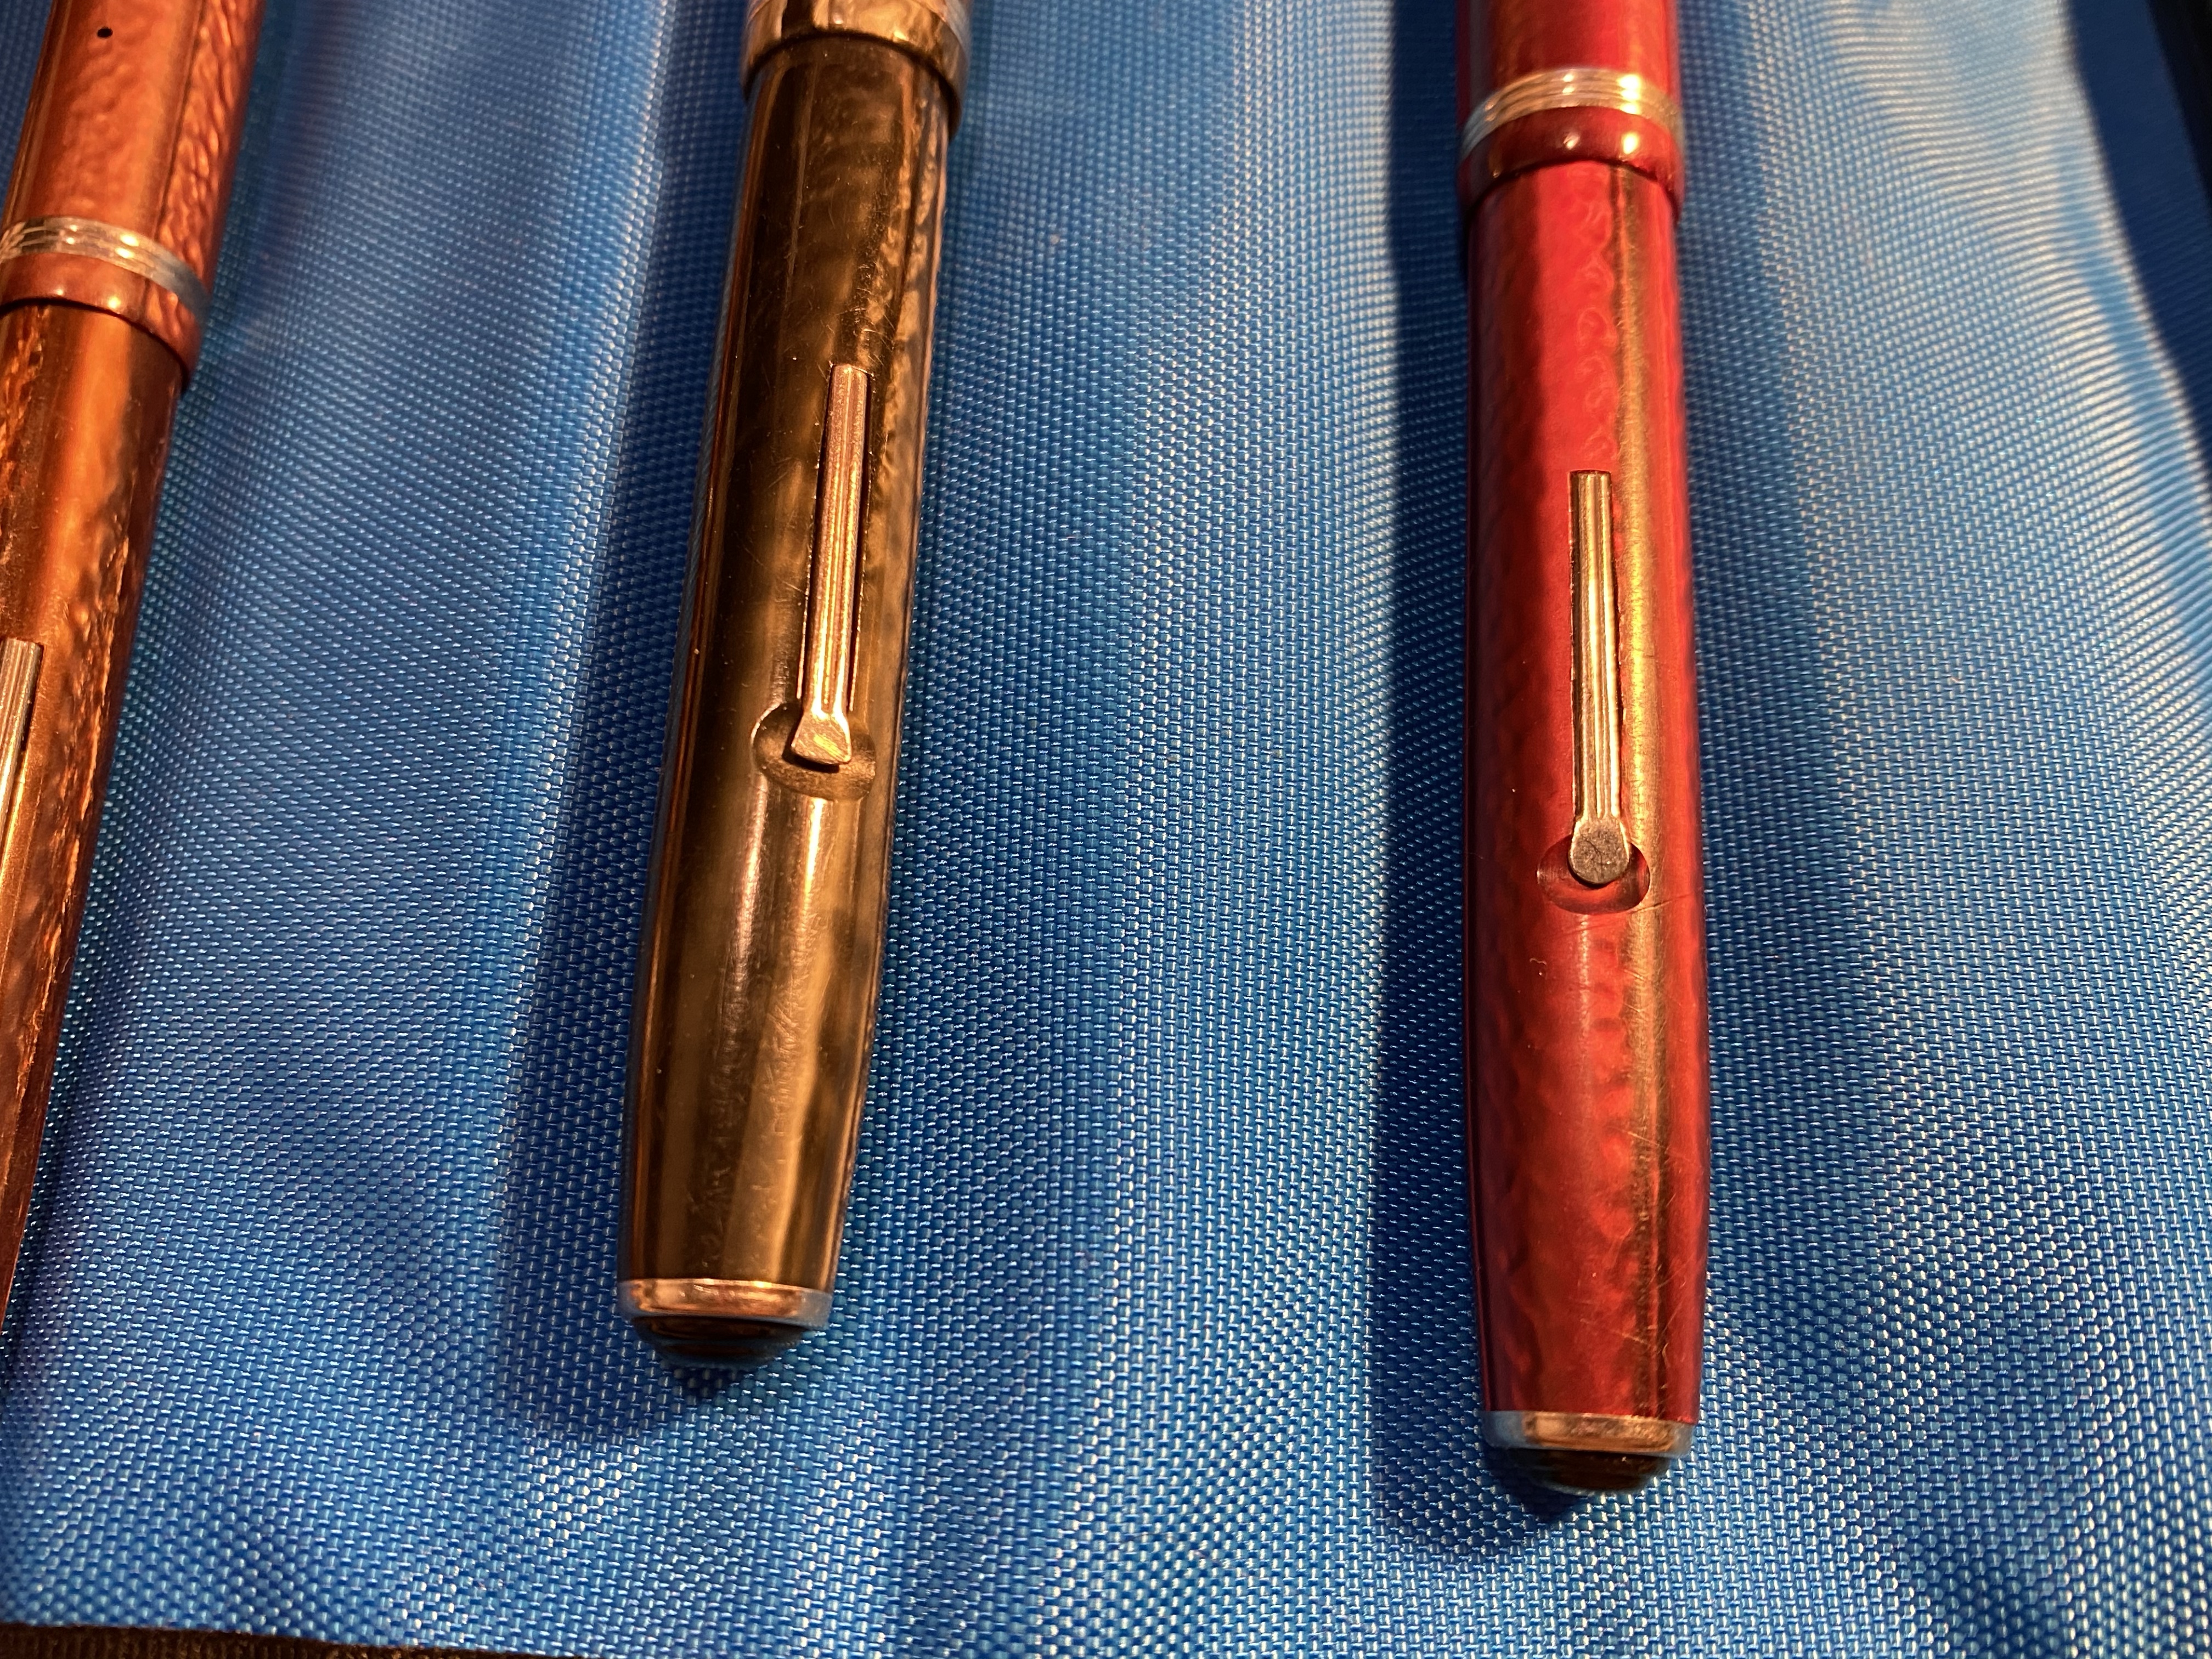
They’re lever fillers, every last one of them.
The dreaded lever.
Lever filler mechanisms are very common in vintage pens, because they are so cheap and easy to produce. They’re also fairly easy to mend, and so you’ll find them everywhere on a vintage dealer’s table or on a vintage pen site. They are my second least favourite filling mechanism (hello button fillers, you get first place) because they are not great to use when you’re filling a pen, and they are really not great to use when you’re cleaning it.
The Esterbrook does allow you to bypass the annoying cleaning part in that you can unscrew the nib and clean the pen like that, but you still have to use the lever when you fill the pen, and you still have no earthly idea how much ink is in your pen while you’re writing with it.
So my friendly suggestion would be to delay your first purchase of a vintage fountain pen and buy something a little more expensive (in the $100-$150 range) that is easier to fill and clean. If it turns out that you like vintage fountain pens, then you can start getting used to lever fillers and their quirks.
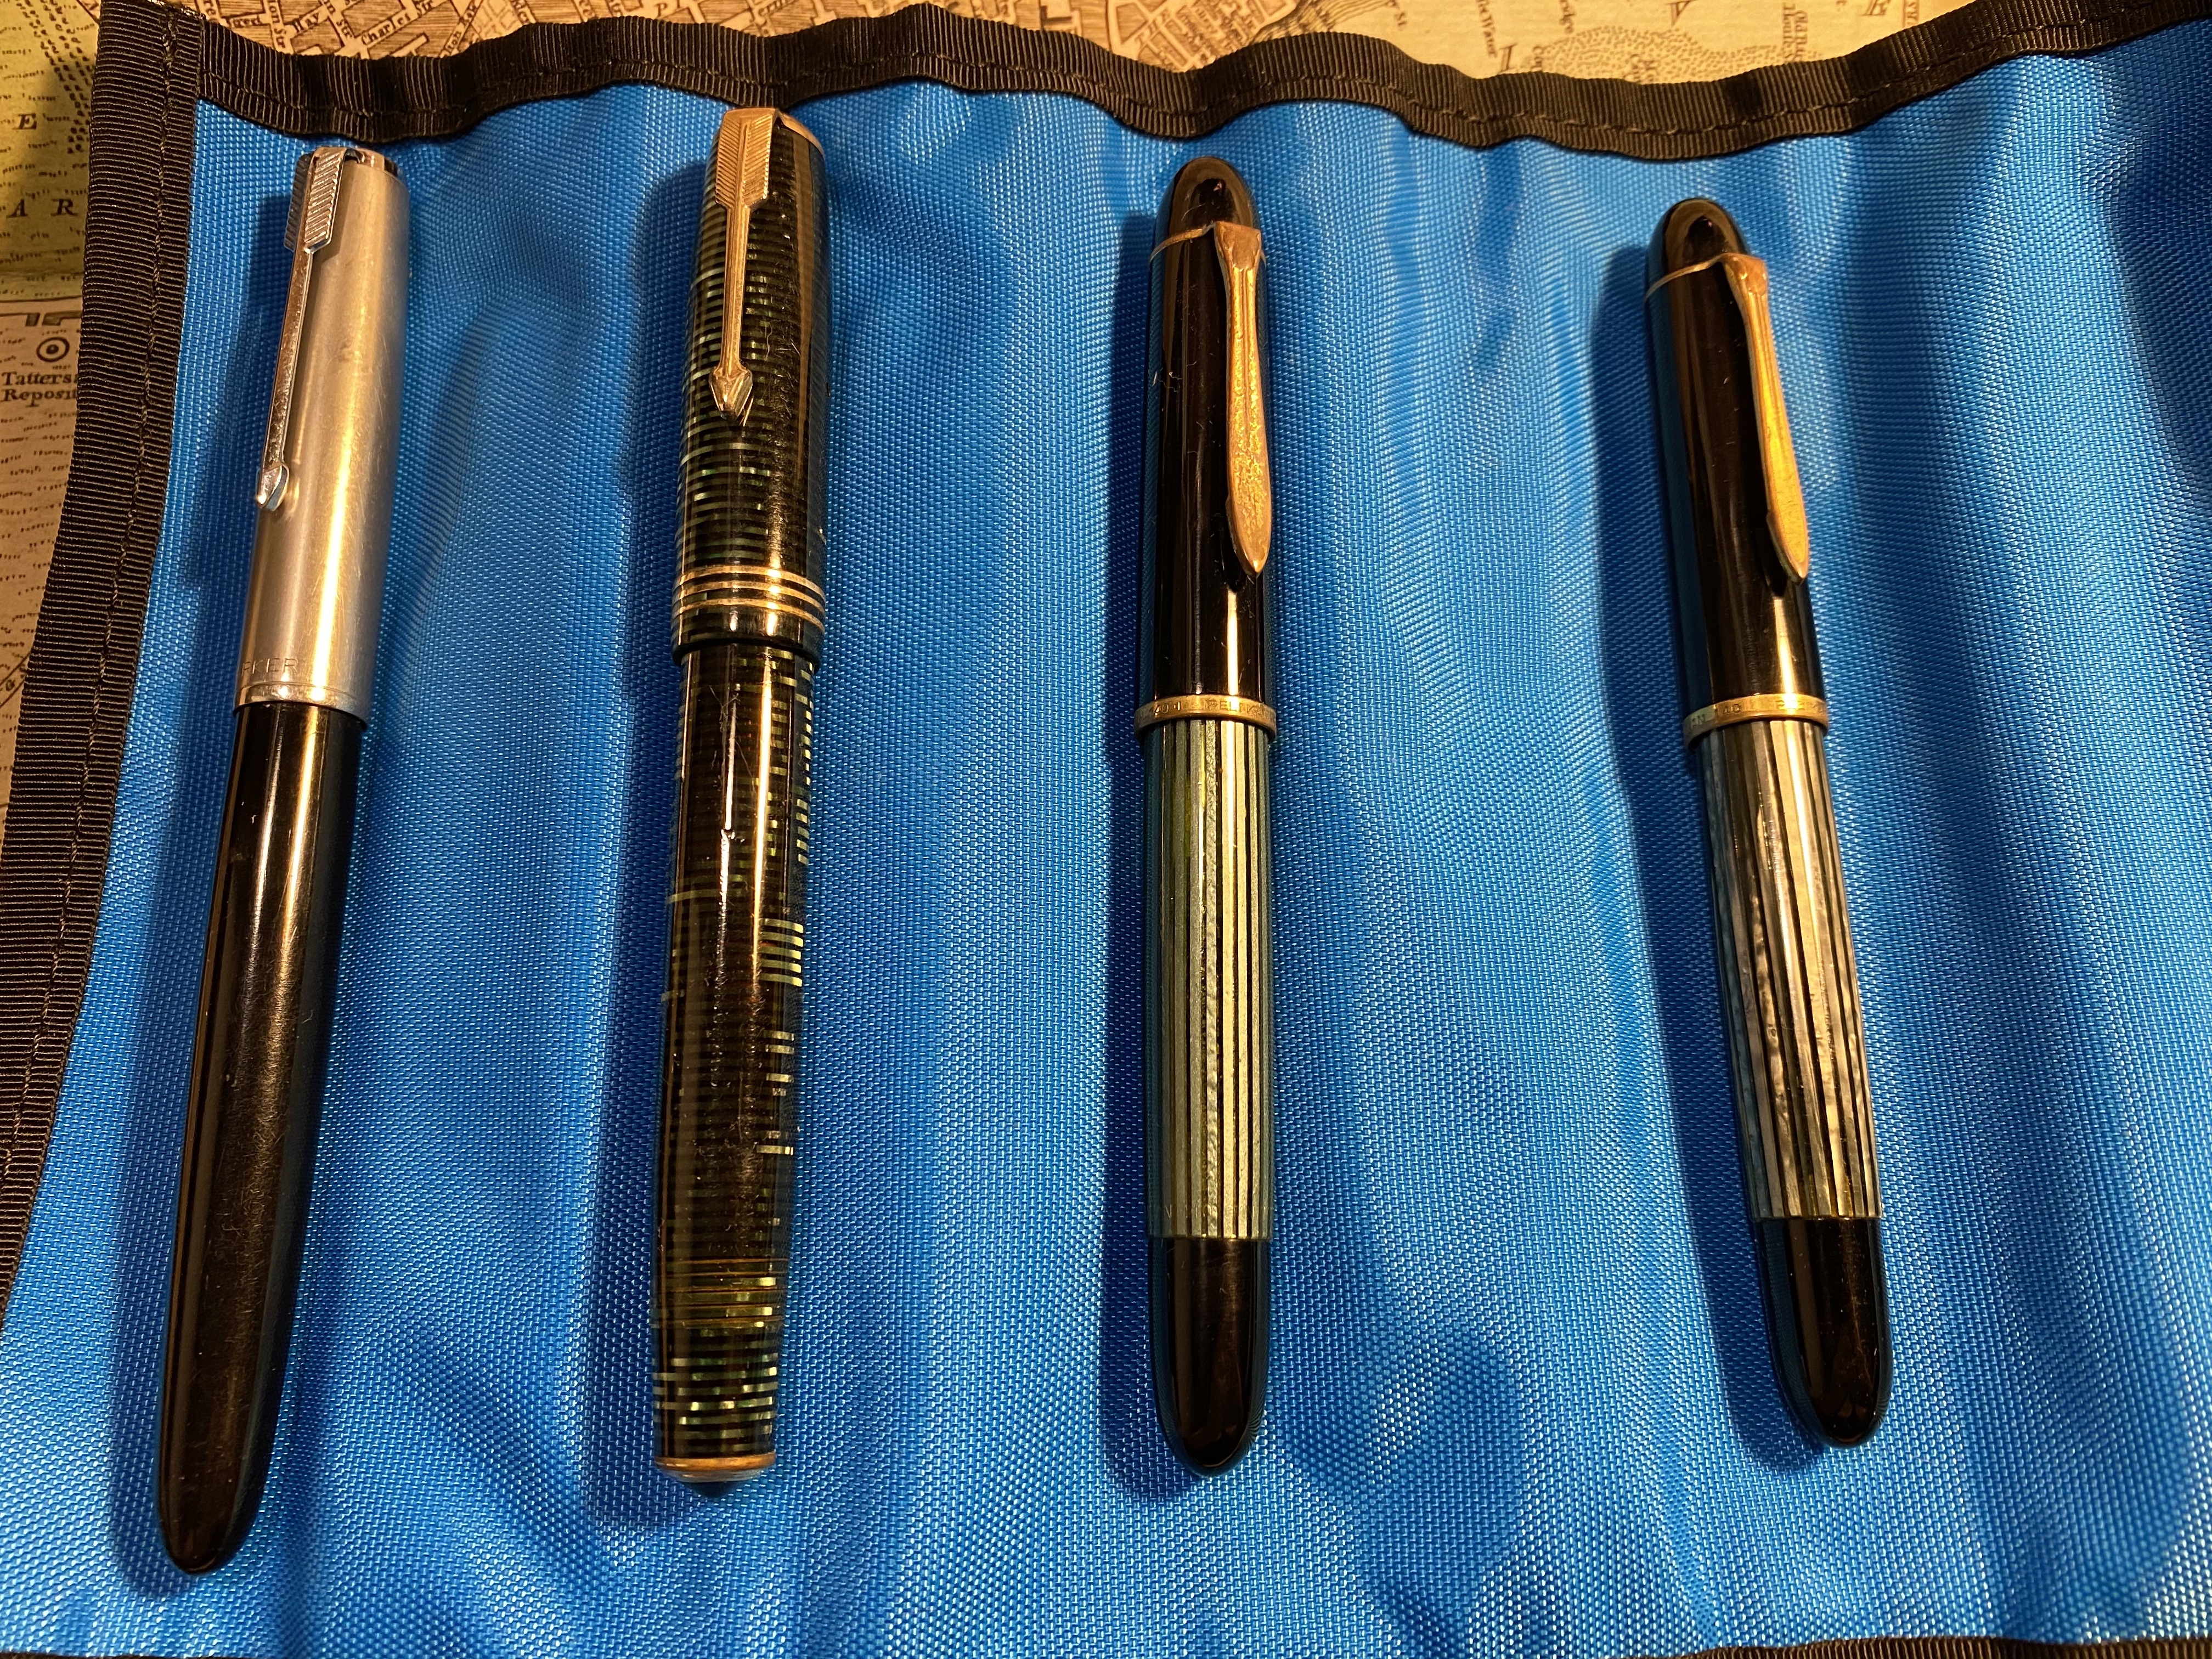
Parker 51, Parker Vacumatic and Pelikan 140
Here are my top three suggestions, in order of most beginner friendly to least beginner friendly (but still friendlier than a lever filler): the Pelikan 140 (a piston filler), the Parker 51 aerometric (an aerometric filler that works like a squeeze converter), and the Parker Vaumatic (a vacumatic filler).
Aerometric, Vacumatic and Piston filing mechanisms.
The Pelikan 140 is a piston filler with a gold nib, and a semi transparent body which allows you to see if you filled the pen properly and how much ink is left. It was made for over a decade and has a wide variety of nibs, so you can quite easily find it, and look for the perfect nib for you, just like with the Esterbrook. It is a more expensive pen, but you can still get a phenomenally good pen (ebonite feed, gold nib which can sometimes have flex, and a large ink capacity) for significantly less than what the same features would cost on a modern pen. The downside is the aesthetics, which can be a little spartan (Pelikan 140s are mostly black with green stripes), and the trim’s tendency for brassing. But brassing adds character, as once a very good vintage pen blog said. These pens are also likely to be more easily obtained in Europe than in the US or Asia.
Pelikan 140
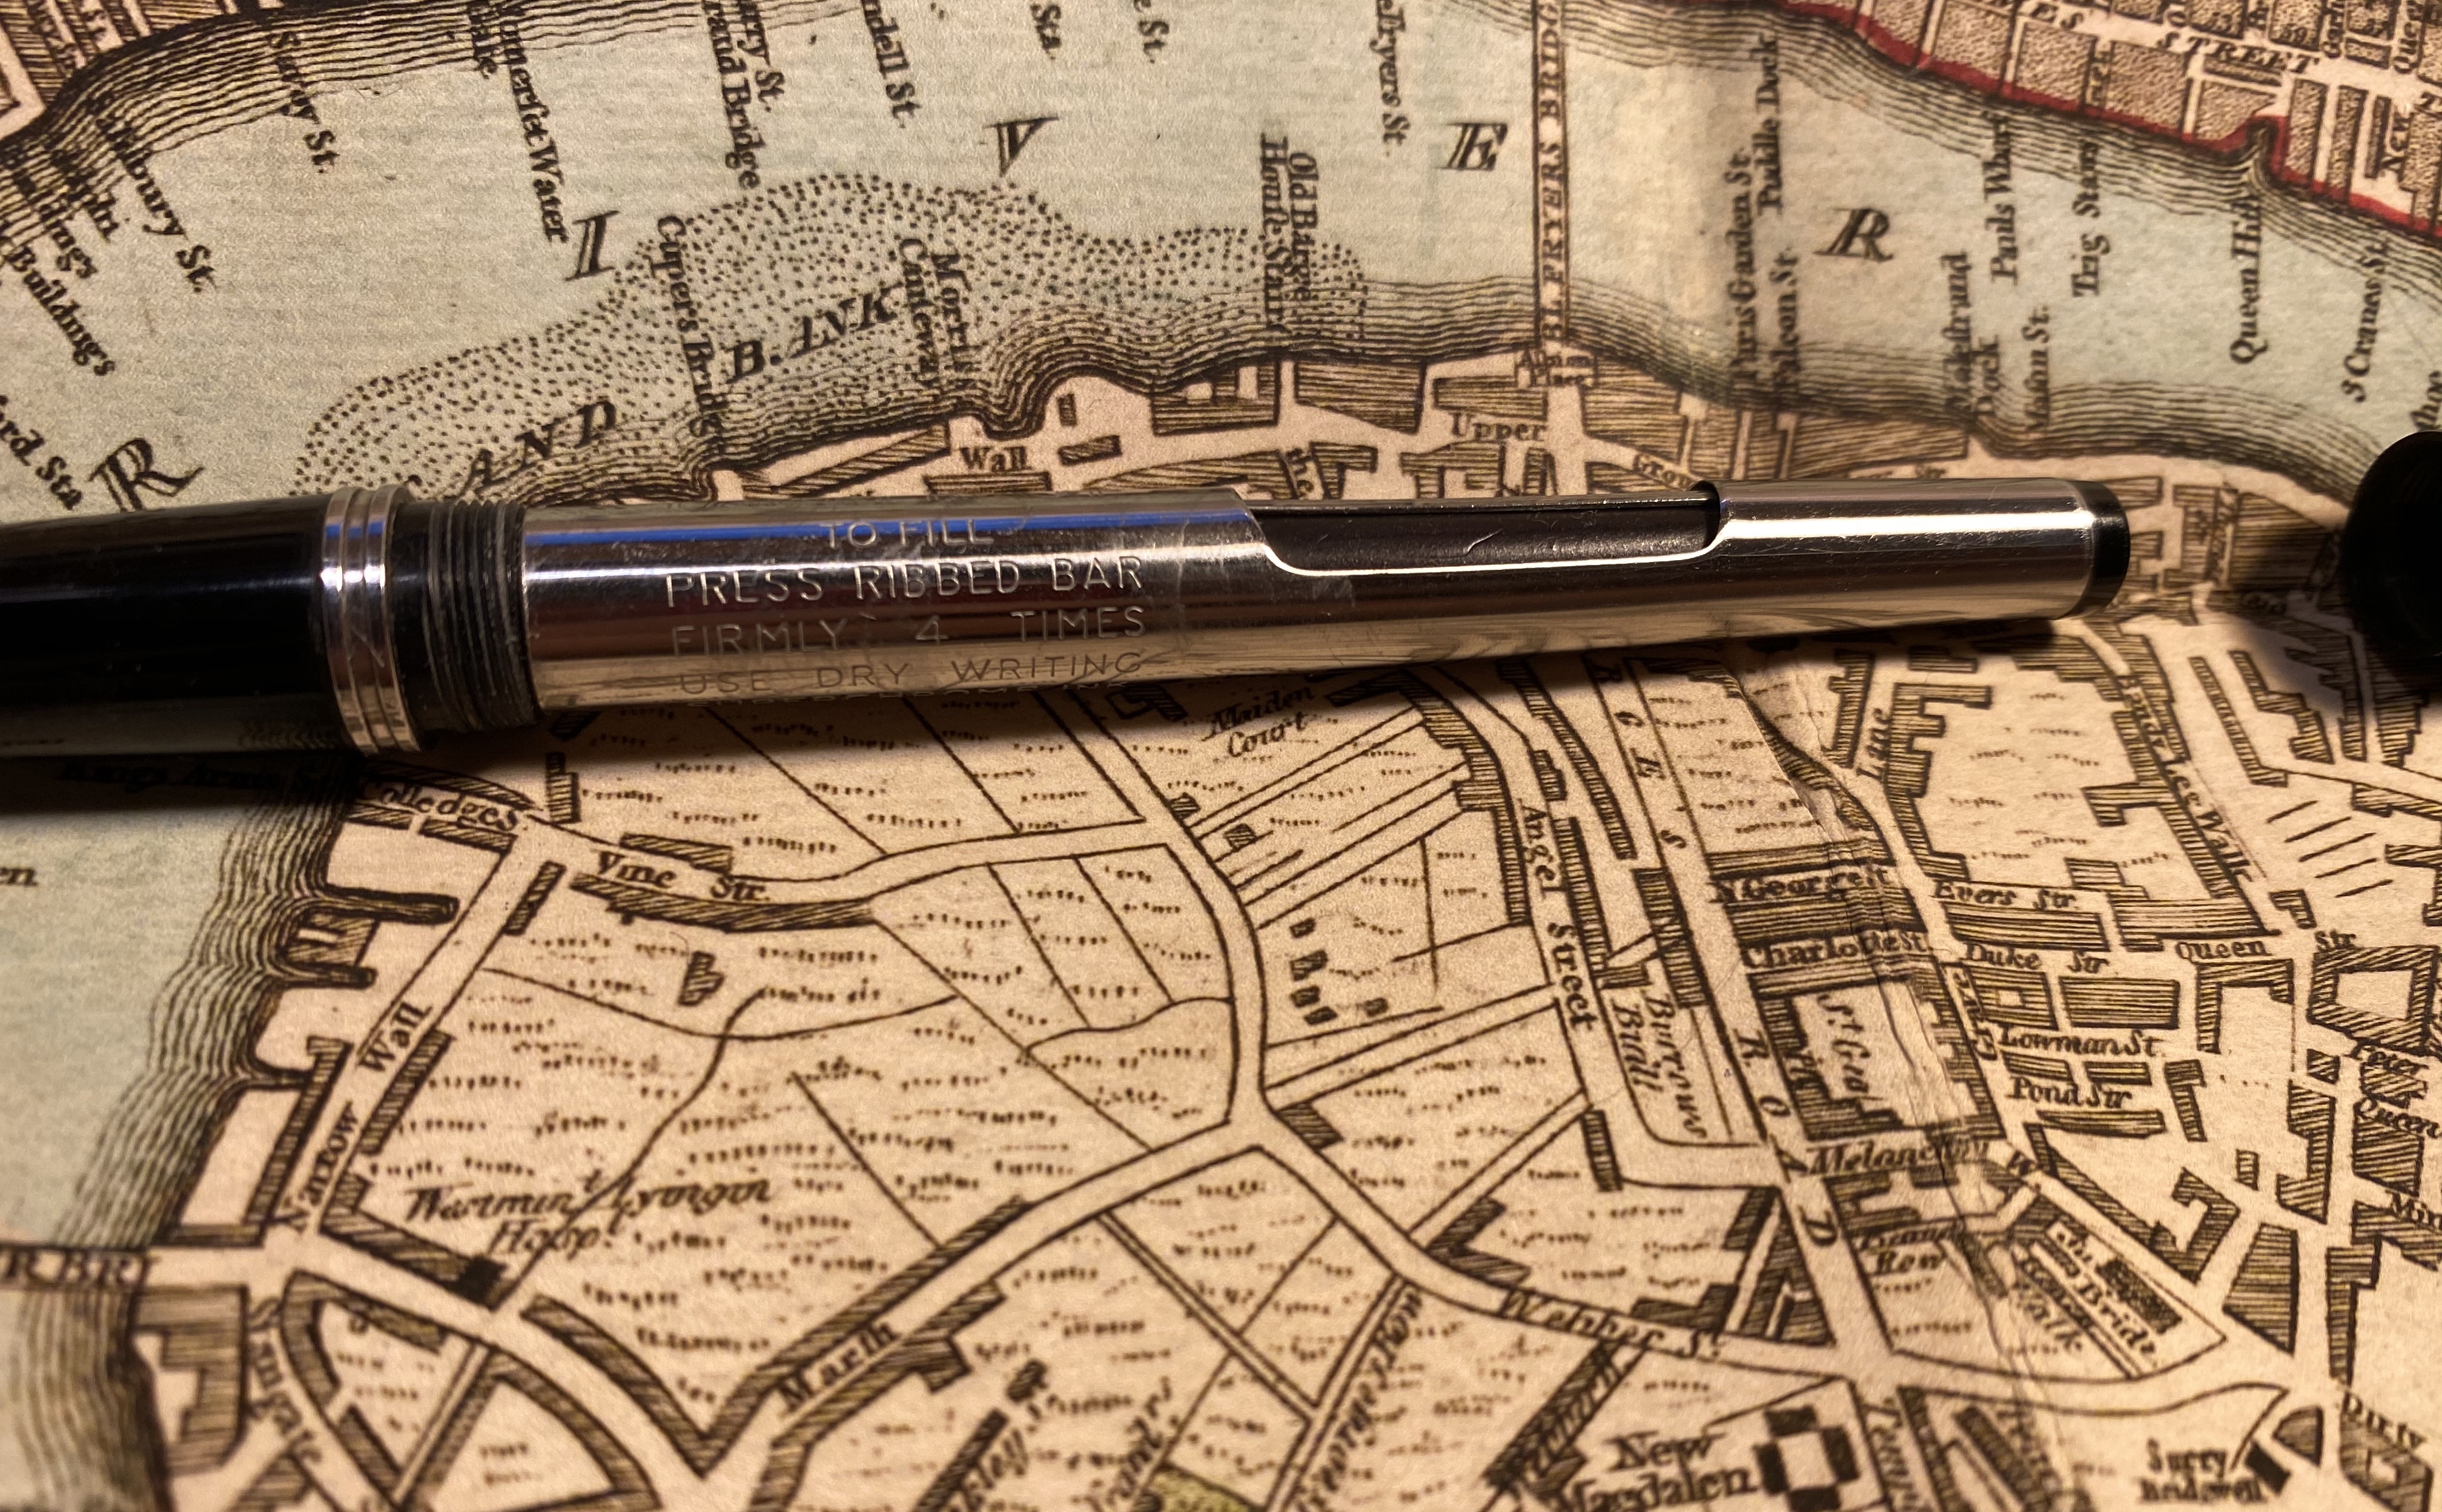
The Parker 51 is still my absolute favourite vintage pen, but that’s not why it’s here. It’s here because the aerometrics (which are also cheaper) sport a filling mechanism that works very much like a modern squeeze converter, albeit permanently attached to the pen, and the filling instructions are etched into the pen, which is very helpful of Parker.
Parker 51
Theoretically you can gauge if there’s ink in the pen using the transparent sack but in most cases the sack will no longer be transparent, and even if it was, its position doesn’t really tell you a lot about the state of the ink in the pen. So it’s relatively easy to fill and clean the pen, but you’re not going to have any indication as to how much ink is in it at any given time.
Filling instructions on the pen body.
The Parker Vacumatics are gorgeous pens with great nibs, and the striped Vacumatics let you know what the ink level is unless they are stained beyond belief, in which case I’d wait a bit for a pen in better condition. The Parker Vacumatics I’m recommending are those with a lock down mechanism. Of the three pens they are the most fiddly, and that’s why they’re in third place, but they allow for a relatively large ink capacity, and the option to see the ink levels at all times, so they go on the list. To fill the pen you unscrew the blind cap, give the metal nob on the top a slight turn and push (a bit like opening a child proof pill bottle) and then the metal plunger springs out. You push the plunger a few times to fill the pen, and then you push down the plunger and twist it once it’s down so that it locks back into place. If you’ve ever used a child-proof pill bottle then you’ll be familiar with the push and twist mechanism, and if not have it demonstrated when you buy the pen or find a youtube video that shows you how to do it. It’s not difficult.
This is a more expensive, double jewelled model, but the filling mechanism is generally the same on cheaper vacumatics.
The Parker Vacumatics are not as intuitive to use as a lever filler, but they allow for an ink window which means that you can see if you have ink left or if you’ve filled or cleaned the pen properly pretty easily:
You can see the ink levels through the orange transparent bits between the stripes.
These pens are never going to compete with the Esterbrook pens on price because they have gold nibs and more sophisticated filling mechanisms. They do quite easily compete with modern pens in terms of bang for your buck when it comes to getting things like a piston filler with a flexy double broad gold nib. If you’re buying a vintage fountain pen that you want to have a relatively easy time filling, using and cleaning, and that will give you a unique and oftentimes exceptional writing experience, any one of these three pens ought to do.
And just to set the record straight: I love Esterbrook pens, and there was a time when I used them constantly, and I still heartily recommend them as they are little workhorses of delight. It just occurred to me that perhaps that little lever combined with the opaque body may be off-putting to new users, and so I’m suggesting a few (much more expensive, sometimes harder to obtain) alternatives. With vintage fountain pens purchase patience is required and not FOMO, so it’s worth waiting for a great $100 pen that you’ll use more than buying a $50 one that you won’t.