Dip Pens Part 1: Some Basics

It’s been a while since I used my dip pens, and since I had a project in mind for them, I thought I’d document parts of it here.

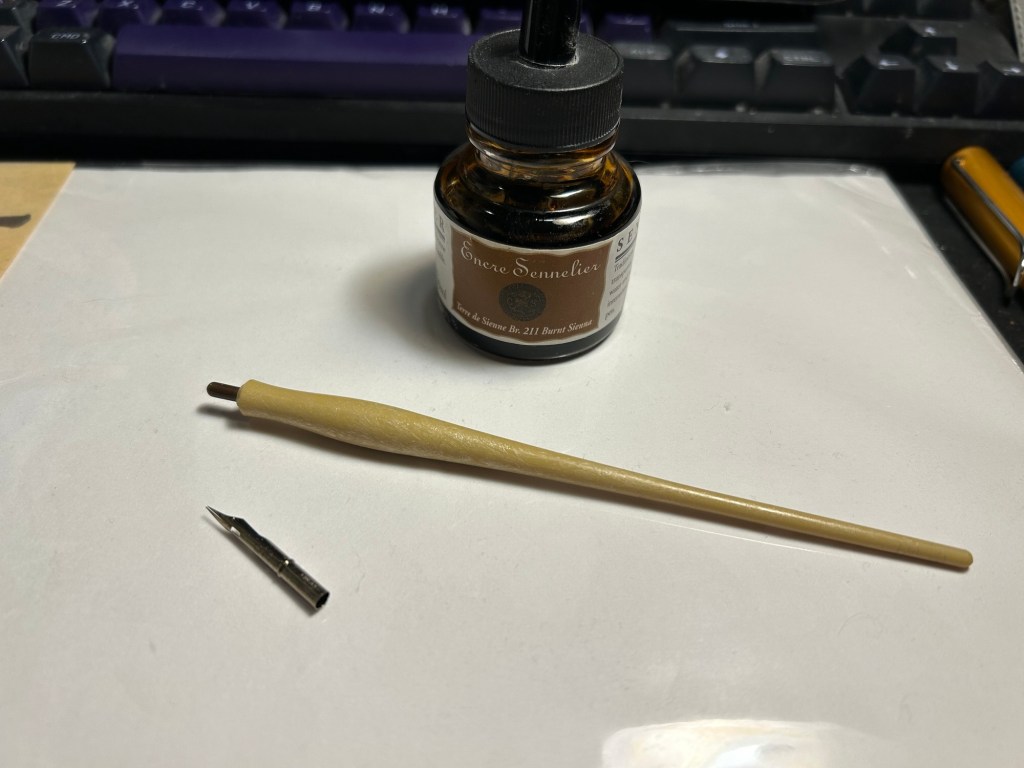
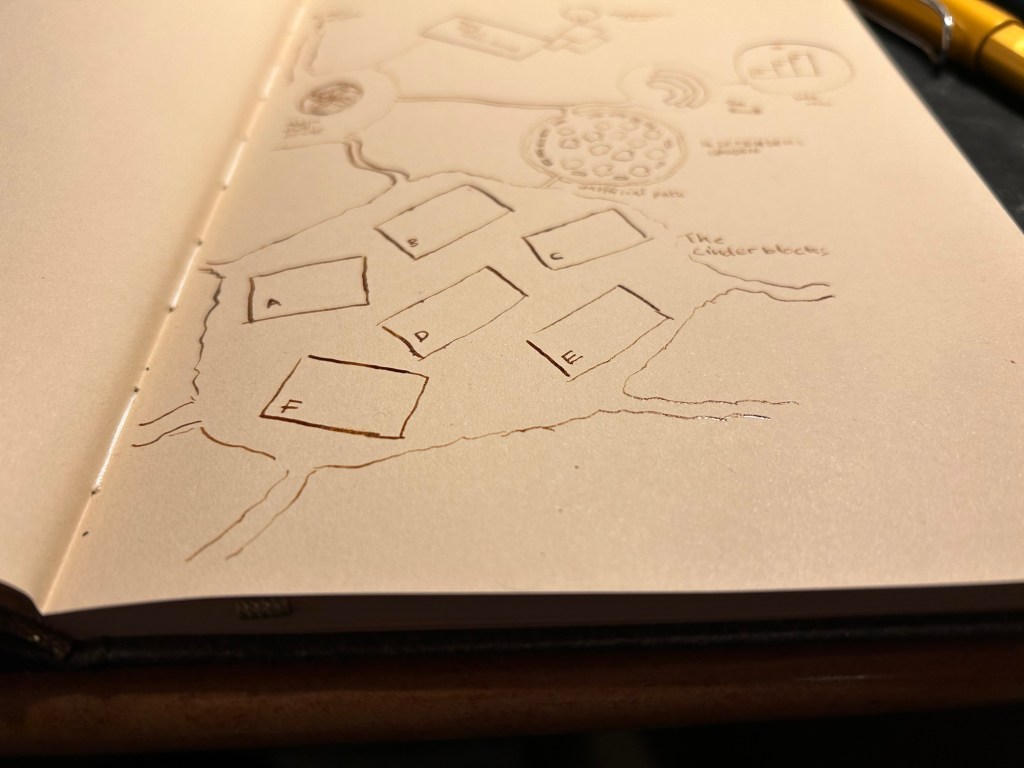
I was looking to draw a map, part of a series of maps for a D&D game. Since I was trying to get a certain look to these maps, I pulled out a mapping nib and a mapping nib holder, and some Sennelier Sepia ink.

The ink is shellac based and meant to be used in dip pens only. If you use it in a fountain pen it will destroy it upon first use. You only need to see how sticky these inks are once to understand that, but most of them helpfully provide warnings on the bottle.

The nib is a Leonardt 801 mapping nib, made in England by the British company Manuscript and purchased, together with the mapping nib holder at Cornelissen & Son in London. They have the largest and best variety of dip nib supplies that I’ve ever seen, and are used by many illustrators and cartoonists. The beauty of dip nibs, however, is that they’re pretty easily and cheaply obtainable. Speedball sells a kit that includes a wide variety of nibs, including a mapping nib, and two holders (a standard one and a mapping one, known as a crow quill).

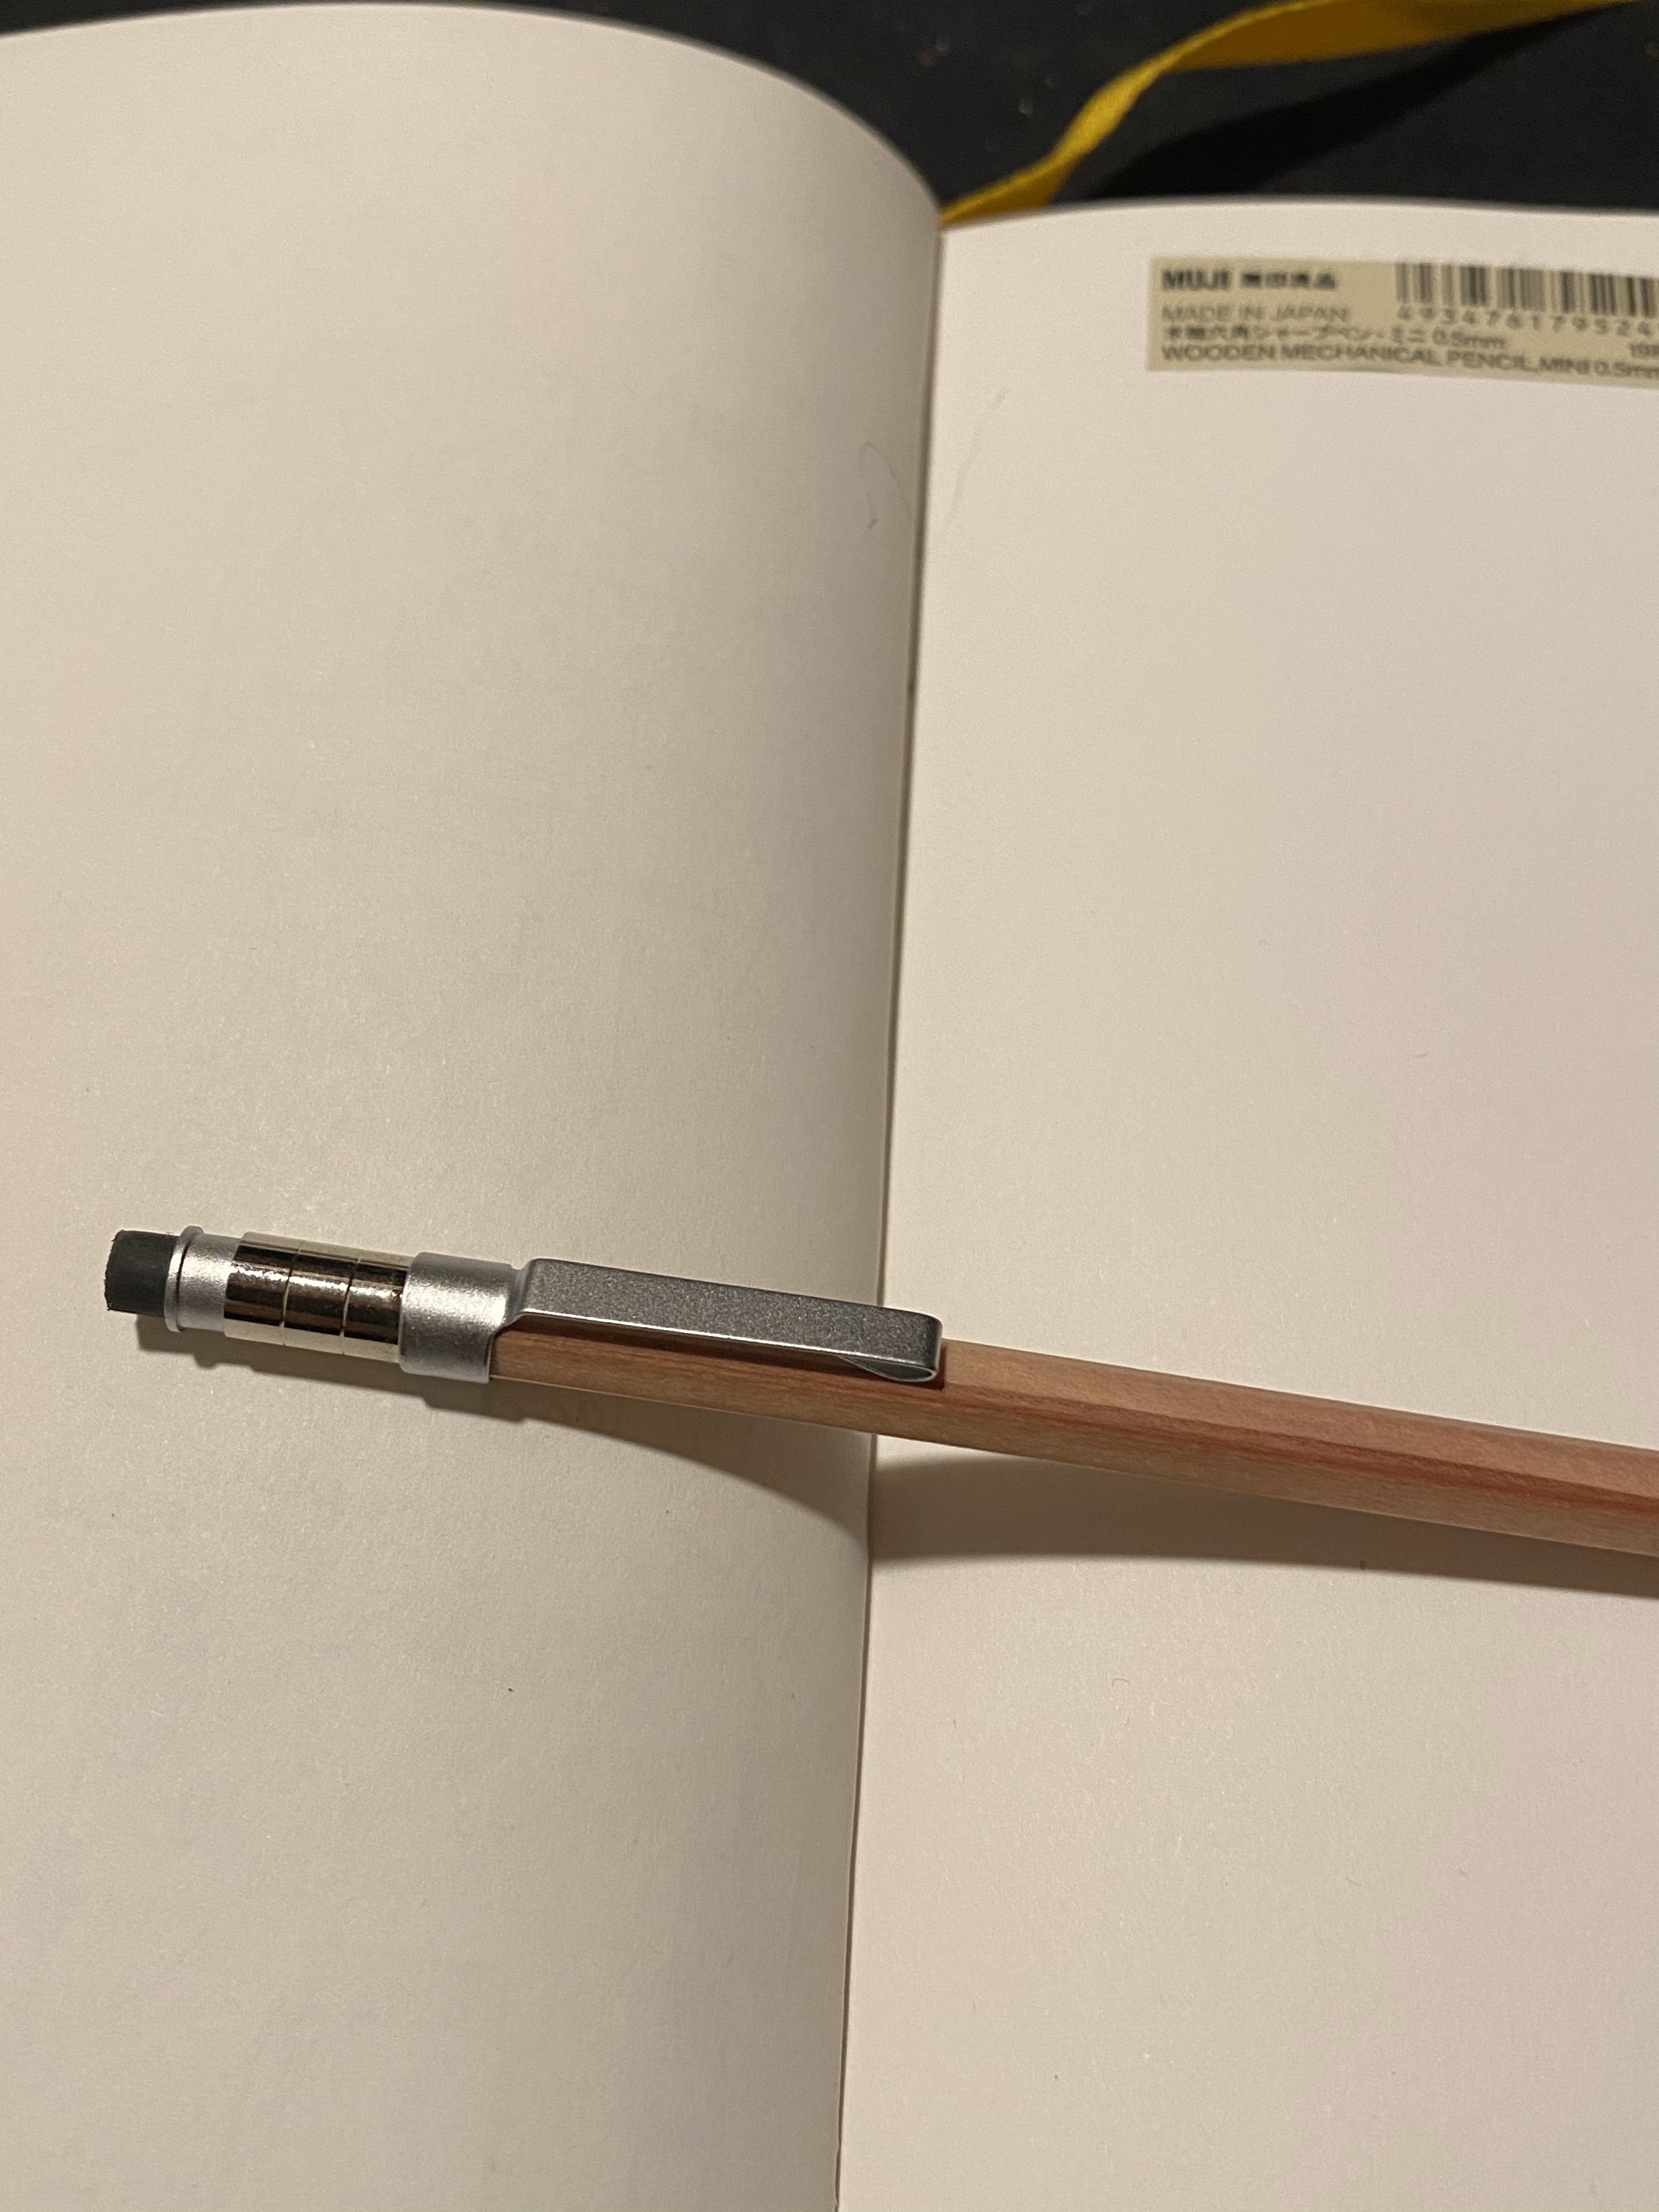
What’s the deal with a mapping nib? It’s a small, round nib with an end that’s actually a cylinder, and you pop it onto the little peg at the top of the holder. Mapping nibs allow for very thin lines, and yet also a good line variety as the tines are sensitive to pressure.

If you’ve used a fountain pen before and then try to use a dip pen, you’ll likely be surprised by several things. The first is that most dip pen nibs, and mapping nibs in particular, are very sensitive to pressure. The slightest push down will give you more line variation that you’ll get from even the most flexible of flexible fountain pens. The second is that there’s no tipping material. That means more feedback from the page, and that you need to be aware of the directionality of the nib if you don’t want it to snag and spray ink everywhere. This is also why the paper you want to use will be smooth. Smooth surface cartridge paper is your friend.

India ink (the shellac based ink used for dip pens) lays on top of the paper and retains a level of gloss and a dimensionality that you just don’t get with fountain pen paper. You can feel the ink lines with your fingers once the ink dries. The ink dries quickly, and is sticky and staining when wet, so beware of nice clothes and wash your hands well once you’re done.

You can see the line variation and shiny properties of the ink.

The nib itself needs to be prepared before you use it for the first time. New nibs are coated in oil and sometimes with wax before being packaged. This prevents them from rusting, and helps them not stick to each other too much as they’re being packaged. If you use a new nib without preparing it, you’ll be disappointed. It will carry little to no ink, and you’ll find yourself dipping the nib again and again. The map above was made with 4-5 dips only, using a new nib, but one that I prepared.

How do you prepare a dip nib? The simplest and safest way (no, don’t take a lighter to it) is as follows: gently clean the nib with water and dish soap (you can use a soft toothbrush if you want, but it doesn’t really require scrubbing) and then put it in cup with boiling water for 1-2 minutes. Then fish the nib out and dry it very, very, very well with a paper towel. You don’t want to air dry the nib at any point or it will rust.

You can see that the ink is raised above the paper and retains its shininess

You can use fountain pen ink with dip pens, but I don’t recommend it. Fountain pen ink is thin and water based, so it doesn’t cling to the nib like India inks. You’ll be dipping a lot more often, and your results won’t be as good. If you plan on using a dip pen to test out fountain pen inks, know that your test will only show the colour properties of the ink but not its flow (wet/dry). Also don’t use a mapping nib for that – mapping nibs are best used for small sketches, maps, things that require very thin lines and some line variation.

When I work with a dipping nib I keep the nib constantly wet with ink (not water!), and immediately when I’m done I either wash the ink from the nib and dry it very well, or I wipe the ink off with a cotton rag if I just plan to take a short break. Ink left to dry on the nib may clog it (particularly with mapping nibs), and soaking a nib in water will cause it to rust.

You may find dip nibs in flea markets for very cheap, usually in a pile in a little box. Check if they aren’t rusted (don’t buy rusted nibs), and then clean them as you would a new nib (water, soap, heat).

I’ll be going over various kinds of India inks and various kinds of nibs in future posts, but in the meanwhile if there’s anything that interests you in dip nibs let me know in the comments.

Painting Minis

ReaperCon started yesterday and for the first time ever I’m actually able to participate. Yesterday I just listened to the classes, but today I jumped back in to painting minis.

This is the Reaper Bones Townsfolk Rioting Villager. After I took these photosI went back and softened the shading on his face a bit. I gave him a dirty, rusty pitchfork, and I tried not to take too much time on him (it still took longer than I would have liked). I also had a bad time with cutting off the mold lines, so I gave up after a few tries. In any case he’s not a display piece, but meant to be used in a game (when I can return to in person games).

He looks scary, right?

I made a wet palette out of an old takeout box, some paper towels and a bit of parchment paper. I’ll later improve on it, but for now it gets the job done. I’m also experimenting with a new of taking painting notes in a notebook, but l’ll see if it works before I write about it.

Wet palette.

Starting a New Roleplaying Campaign and Running a Game Remotely

So I’ve been drafted today to run a new roleplaying game for three players over Discord. Two of the players are experienced, one of the players is completely new to roleplaying games. After a bit of debate we settled on Dungeon World as our system. As an aside I’ll say that I highly recommend Dungeon World both for newcomers to roleplaying, and to GMs and players who are short on time. It’s a phenomenal system which lets you get to do a lot of cool stuff fast, and allows you to have a character that is fun and functional from level 1.

The challenge with this adventure is that I need to create something fast, so that we can have our first session sometime next week, and something that’s appealing and accessible to players with vastly different experience levels. Also, I actually need to have fun running it.

I’m also running the second session of a very dense urban D&D 5E campaign tomorrow. It’s a game that is challenging to run particularly in terms of tracking the vast and complicated cast of characters, and the various locations the game can unfold in.

So I thought that I’d write a few posts on the various tools that I use to plan, organize and track my games. What I use changes based on the game, and also based on how happy I am with the results I previously had with it. I’ve been DMing and GMing for 17 years now, and during that time I’ve tried out a lot of tools and approaches to handing the “backstage” parts of roleplaying games.

A few words about Covid: my main RP group moved to playing over Discord a few years ago, when one of the players moved abroad and we wanted to keep on playing together. We started out in Google Hangouts before Google did terrible business-y like things to it, and then we moved to Discord, which has been our home for a good long while. Due to Covid a lot of groups have now been forced to make that same move or else forgo playing at all, and the internet has exploded in the past few months with a lot of resources for running online games successfully. A lot of these resources are very helpful, but a lot of them also just add “noise” and added pressure to the already tough job of being a DM/GM. If you are running a game for an online group, whether it’s your first game or not, don’t feel the pressure to run a game at the level of production that you see on various podcasts/twitch/YouTube channels. You don’t have a production budget, you don’t have a production team, and here’s the thing: your players aren’t expecting that. They just want to get together and have fun for a few hours. Prep as you would for a face to face game, with a little added attention to images that you can send in the chat (monsters, NPCs, maps, etc), and make sure that you have video on, or the players will miss a lot of nuance in your body language. Keep it simple and add complexity only if needed, later on. I recommend using Discord with the Sidekick and DiceParser bots (you want two as a backup, because eventually one of them will lag or break), and Google Docs/Dropbox to share sheets and information between sessions. If you’re playing D&D 5e then I highly recommend managing the character sheets on D&D beyond, and gradually learning to use the Avrae bot in your game (it’s got a lot of commands, so don’t sweat it if you don’t start running all your combat scenes with it from the first session on). If you need a mapping resource, here’s a free, open-source browser based tool called mipui that one of the former players in our game made. It’s very simple to use, and it works just fine for D&D games. I recommend using it in Chrome. Remember that technology has a tendency to break and jitter, and be patient.

If you’re someone that’s always wanted to play but never had a group, now is your golden age. Tons of new groups are forming up using Facebook, Reddit and Discord to find new players.

This post came out longer than I expected, so I’ll go an brainstorm and plan for my games, and I hope that you find your people and start gaming too. There’s nothing like RPGs to bring a group people together for a few hours of blissful, harmless fun.

Muji Wooden Mechanical Pencils and Pen

I was organizing some things around the house when I found a brown paper bag with the Muji logo on it, and in it was some washi tape and three wooden writing instruments: two mechanical pencils and a pen. There appears to be an advantage to being a forgetful unpacker, as I get to enjoy a little trip to a London based Muji store while I’m stuck at home in quarantine times.

Here are the three writing companions:

Muji Wooden Mechanical Pencil, Muji Mini Wooden Mechanical Pencil and Muji Wooden Ballpoint Pen

I was drawn to them because they were wood encased, and they had that very sleek, minimalist Muji design. They weren’t expensive, so even though I’m generally not a ballpoint fan and the mini mechanical pencil looked more like a novelty piece than an actual writing implement, I bought all three.

And promptly forgot about them.

Muji Wooden Mini Mechanical Pencil

Well now I’m giving them a spin, and I can’t help but be intrigued the most by the least practical of the bunch: the wooden mini mechanical pencil. It’s a 0.5 point pencil, which is pretty bog standard for mechanical pencils, but here’s where the standard ends and you venture into the wild world of Muji industrial design. The pencil is very, very, very, very thin and also very, very light. It makes all other pencils, mechanical or not, look like veritable giants around it. It is 0.6 cm wide, which is tiny, and it feels like a delicate little twig that will snap at any minute, making it quite the adventure to write with. You get a little thrill when you pick it up and scribble with it: will it break? will it survive to write another day?

Your own mini “Survivor” in pencil form.

The design of the cap and clip area are both peculiar and handsome. There’s a combination of matt and shiny aluminum parts that make a striking statement, especially on an otherwise minimalistic pencil body. There’s no branding anywhere, and no indication of the lead size that this pencil takes (though that isn’t hard to guess). If the metal bands serve a practical purpose I can’t think what it is. They seem a bit blingy at first for such an understated pencil, but I think that they do add to the design.

The pencil tip is very short and stubby, which adds to the kawaii of the pencil and yet keeps the tip visible. Which would be important if you could actually do any kind of writing or drawing with this pencil, but it’s just too thin to be used for anything but a sentence or two once in a while when you have no other choice. It’s like trying to write with a pen refill without the pen body: not something you would ever do unless it was an emergency and it was the only option you had.

All in all this pencil feels like a designer or a maker got a challenge to “make the smallest usable mechanical pencil possible, something nice that we can use in a Filofax ad”.

The Pentel Graphgear 1000 in comparison to the Muji Mini Wooden Mechaical Pencil.

Now we’re back to normal pencil size world, and it’s time to take a look at the Muji Wooden Mechanical Pencil. It’s also a 0.5 pencil, and it has a very Muji/IKEA sort of look to it. It would definitely feel at home in an IKEA ad for a desk.

The wooden barrel is the highlight of this pencil, and since there aren’t many wooden mechanical pencils around and this was an inexpensive purchase I would recommend splurging for one if you have room on your desk.

I say “on your desk” because while the wooden pencil body is good looking and feels great in the hand, it is uncoated. This means that it will pick up dirt and dings from being carried around in a case, a bag or a pocket. Even on your desk it’s likely to become sullied with use, although I have had luck with using erasers to clean soiled wooden pencil bodies before.

Muji wooden mechanical pencil alongside a Uni-ball M9-552 drafting pencil.

The pencil is slightly shorter than a standard mechanical pencil, and it’s a very light pencil, but it’s absolutely usable, unlike its mini counterpart.

The Muji Wooden Ballpoint Pen is probably the one that I’ll use the most of all the bunch. It’s a 0.5mm needlepoint ballpoint that writes with a really fine, clean line. The refill, like the pen, is completely unbranded, but I’m pretty sure that it’s made by a large manufacturer like Uni-ball or Pentel. The only ballpoint pen that I have that writes remotely like this is the Traveler’s Company ballpoint, and this pen is more comfortable to hold and use.

The design aesthetic is the same as the mechanical pencil, very Muji/IKEA modern and minimalist. Like the mechanical pencil the wooden body makes for a lightweight pen that feels lovely to hold but is liable to easily get dinged and dirty.

The pen is on the thinner and shorter side when compared to other pens, so it isn’t the greatest for longer writing sessions. It is still a great pen for the price, as it’s solidly built with a good click mechanism and no wiggle in the tip or rattling while you write. Of the three I’d recommend this the most, as a general pen to keep in handy for those times that call for a ballpoint.

I’m drawing a lot of maps and schematics lately for a D&D game that I’m running so I’m using a slew of mechanical pencils for the occasion. Here’s the normal sized Muji wooden mechanical pencil at work on a Baron Fig Confidant:

Tiny, tiny, insignificant us

Our D&D group found itself next to a colossal sleeping white dragon, and one of the characters suggested that we could take it on. I grabbed my Blackwing (811) and created a quick illustration of relative sizes to emphasise just how crazy that idea was.

We didn’t attack the dragon.

Vengeful Fortress Part 3: Rohrer and Klingner Lotte SketchINK Mini Review

Welcome back to Vengeful Fortress, a fantasy roleplaying game that I’m drawing in ink and watercolour (no pencil underdrawing, to save time) as I’m running it for my group of players. We’re now in Part 3, and here are Part 1and Part 2 (which also include a review of the sketchbook I’m using, the Stillman and Birn Epsilon).

As you can see, things are starting to heat up. I’m using a TWSBI Diamond 540 fountain pen with a fine nib, filled with Rohrer and Klingner SketchINK Lotte. SketchINK Lotte is a black pigmented and waterproof fountain pen ink. It’s not a saturated ink, and you can see the grey shading quite clearly here in the lettering and the line work. R&K SketchINK Lotte is also a hard starter, so while it does flow well enough when you get it primed up with a few preliminary scribbles, if you put the pen down for even a few minutes, you’re going to have to prime it again. It is, however, waterproof and relatively fast drying, which makes it worth my time using it. In case you’re wondering if “hard starting” is just an issue with this pen or this nib, I have tried R&K SketchINK Emma and Lotte in a Lamy Safari and a Super5 pen and they are hard starters in all cases. It seems to be a property of the ink, perhaps because it dries to relatively quickly, or because of the particular waterproof formula R&K are using here.

So know that you can trust the Rohrer and Klingner SketchINKs with your watercolours, and know that they’re great for when you’re in a rush and don’t want to wait for the ink to dry, but also have a bit of scrap paper for the first few seconds before you use them .