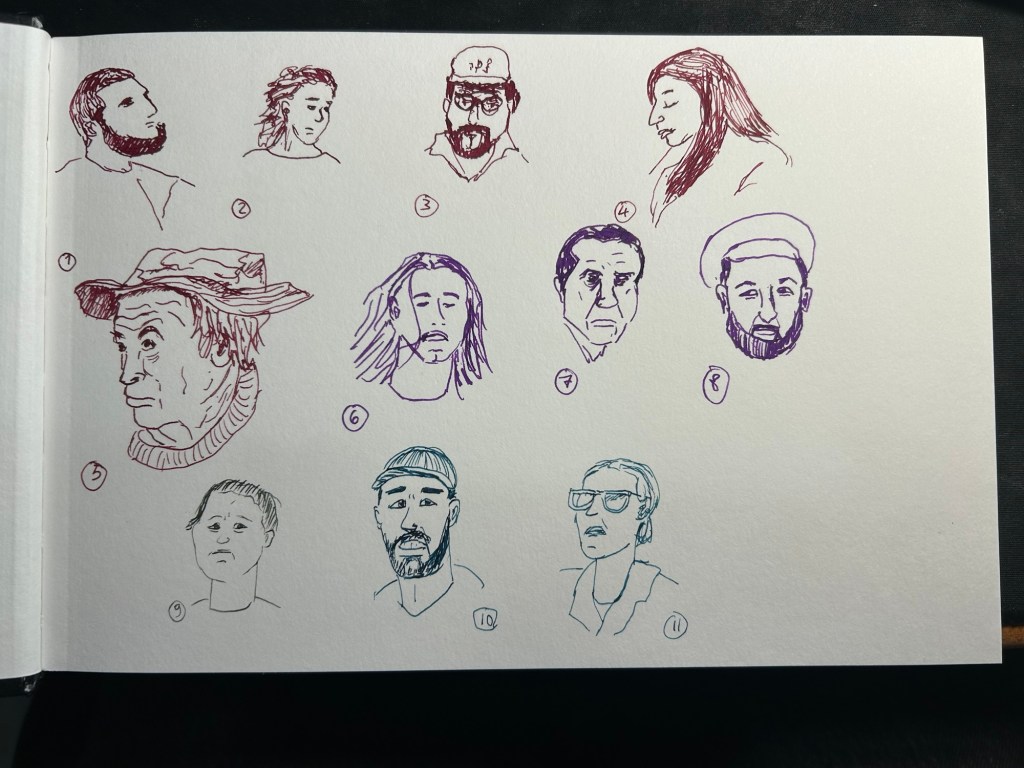
I had a busy day yesterday, so I only got three sketches in and didn’t have time to post them. Numbers 9-11 were what I added, with number 9 being sketched with a vintage Parker Vacumatic filled with Diamine Ash and numbers 10 and 11 being sketched with a Franklin Christoph 45L and Diamine Eau de Nil. I loved the lines that the Parker Vacumatic produced, but it’s an extra fine nibbed fountain pen and it really struggled on the tooth of the Stillman and Birn Alpha. These were the last batch sketched from the Street Photography group on Flickr. I found a better source for photos thanks to a great tip from Tina from the wonderful Fuelled by Clouds and Coffee blog.
I almost didn’t post today as I wasn’t up to sketching and I got only three sketches in, none of them great. But I like it when creators show their failures so I’m doing it myself today: my lack of shoulder mobility coupled with a lack of sleep and the difficulty of the subject made for a bad sketching day.
Parker 51 with Montblanc The Beatles Psychedelic Purple on a Stillman and Birn Alpha. Sketched 6-8 were done today. As usual the goal for me is to get to 100 even if it takes more than a week.
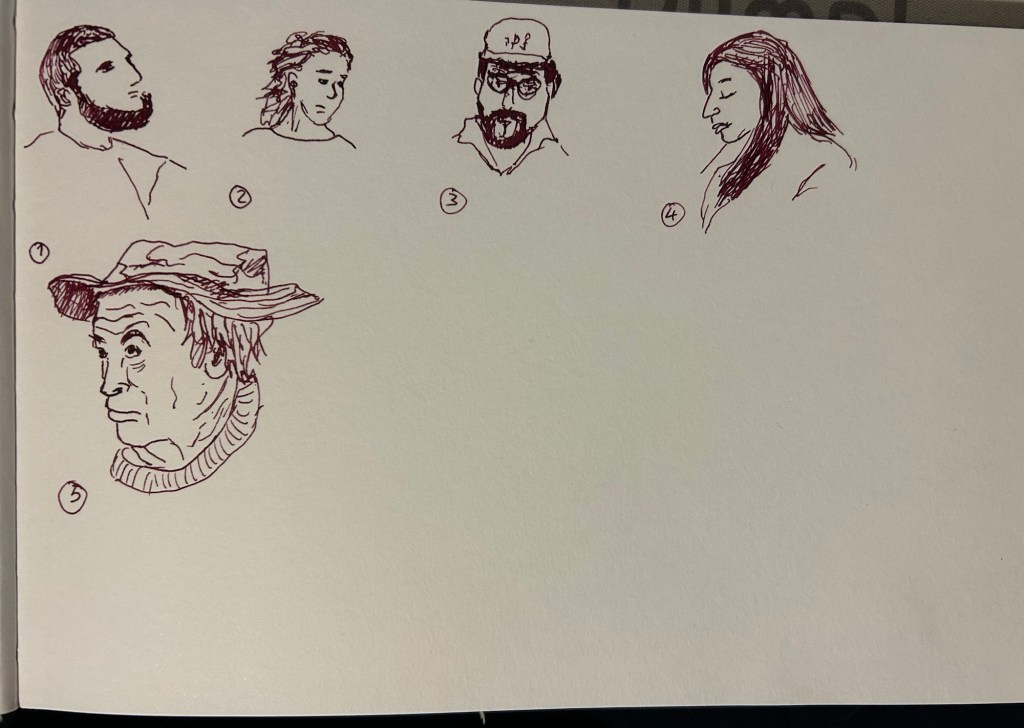
An inauspicious start for this year’s one week 100 people drawing challenge: I hurt my shoulder yesterday and now it’s extremely painful to draw with it. So today’s sketch batch is just five sketches, done with a vintage Radius Comet fountain pen and Diamine Anaranth ink on a hardcover landscape Stillman and Birn Alpha.
These were all sketched from Creative Commons Flickr photos, working for no more than 1-2 minutes per sketch, directly with pen and ink. The expressiveness of this nib has been a lot of fun. Number 5 is my favourite so far, which one is yours?
As I noted earlier, I’ve decided to only post these on my blog this year and not on social media.
When my brother and I visited The Wizarding World of Harry Potter at Universal Orlando we bought a pack of postcards and some postage at Hogsmeade and posted some postcards home. They have a little “Owl Post” booth where you can get your postcard stamped with an owl post stamp, and it’s a charming experience. We ended up with a few postcards left over, so we posted them from our Disney hotel. A few weeks after we got home the postcards arrived and made out day.
I was just at a Shalom Sebba exhibition at the Tel-Aviv Museum of Art and after my visit I went to the museum store and bought some postcards there. Later that evening I spent some time writing postcards for my family, with little sketches inspired by Sebba’s work:
I had no idea where I would post them, as most of the post boxes in my area have been removed, but I wanted to at least try to post them before my dad’s surgery this week. With today’s postal service sending them would be a bit like tossing a message in a bottle into the sea and hoping it would eventually arrive at its destination. Yet there’s something about not just the wonderful experience of receiving snail mail which I wanted to give to my family, but something particular about postcards that made me want make the effort to post these cards that I could more easily hand deliver myself.
More than letter postcards evoke some things to me – a break from routine, a holiday, exotic places, better days. There’s something creative about the selection you make, and they make me want to sketch in them, write in their margins, be creative in the tiny space I’m given to work with. The limited space, zero privacy and the need to withstand the elements at least somewhat makes them a creative challenge we rarely encounter in days where everyone is an instant message away.
Yet that’s what made them appeal to me, because more than anything postcards speak of hope, and these days I need all the hope I can get.
This time I decided to combine testing out a new (to me) India ink, a new (vintage) nib and watercolours. The ink is US made Higgins Black Magic. The bottle shape is unique, and it’s a plastic bottle, not a glass one like my British made inks. While the very wide base of this bottle does cut down the possibility of you accidentally tipping it over, I don’t like the bottle design. The bottle opening is too narrow and tall, and it’s very easy to get ink on your nib holder and hands this way. The ink itself is less shiny and flows wetter than other India inks that I’ve tried, but that’s not a bad thing.
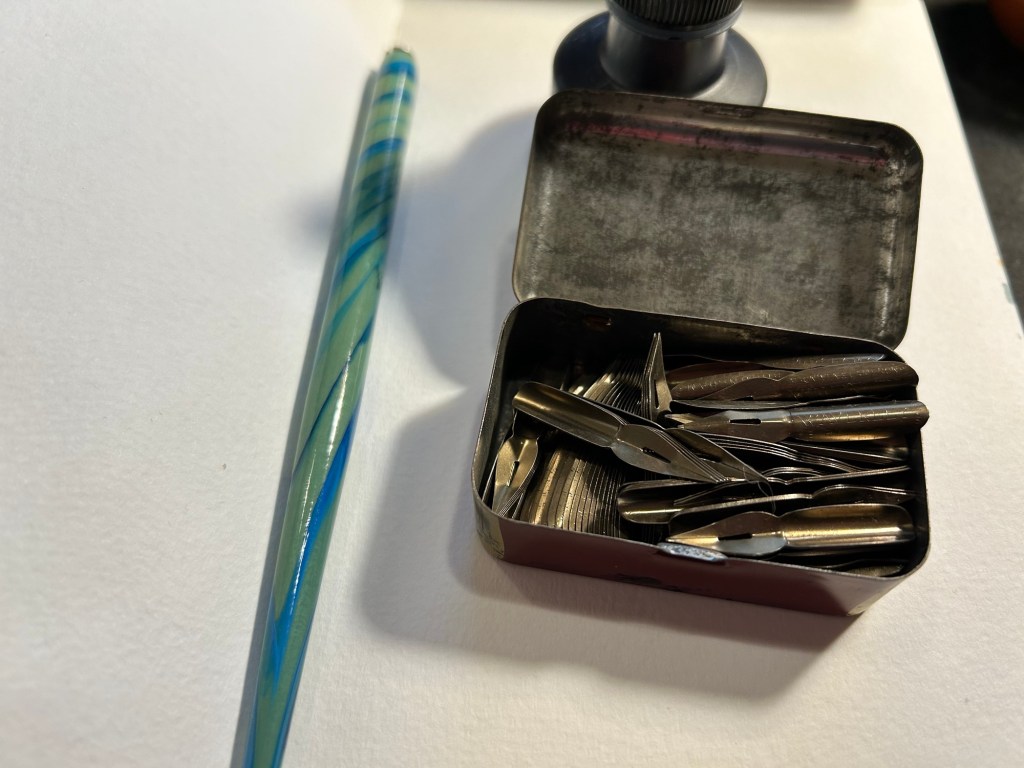
The nibs are Waverley Pen nibs, made in Birmingham (a British steel producing city), and made by Macniven and Camron Ltd.
The tin itself is a delight, with the Waverley Pen advertising doggerel on it (the Pickwick, Own and Waverley were all nibs made by the Macniven & Cameron company). I bought it for a few pounds at Spitalfields market, London, and would have bought the tin even if it was empty:
It’s not empty, but rather filled with dozens of Waverley nibs in excellent condition. I took one out, tested its flexing properties (medium flex), and then primed it as described here. To test a nib for its flexing properties you gently push the tines against your thumbnail (don’t ever do this with fountain pen nibs!).
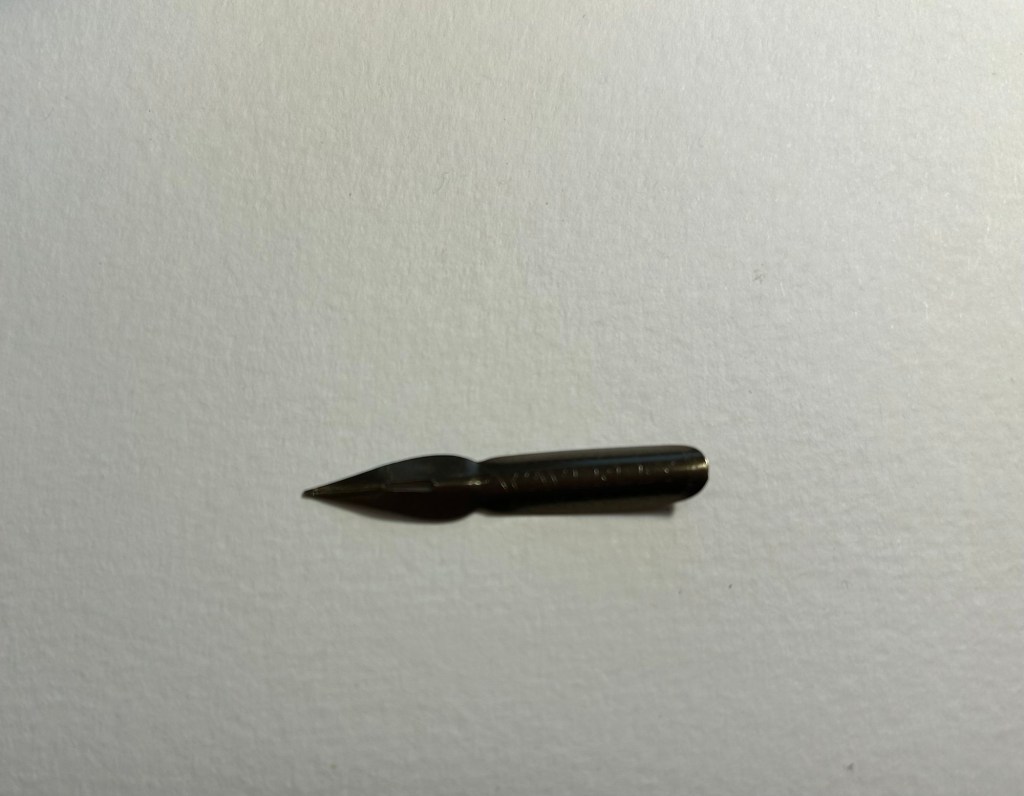
Here’s the nib. It has a bit of kink to it that helps it hold more ink than it otherwise could hold:
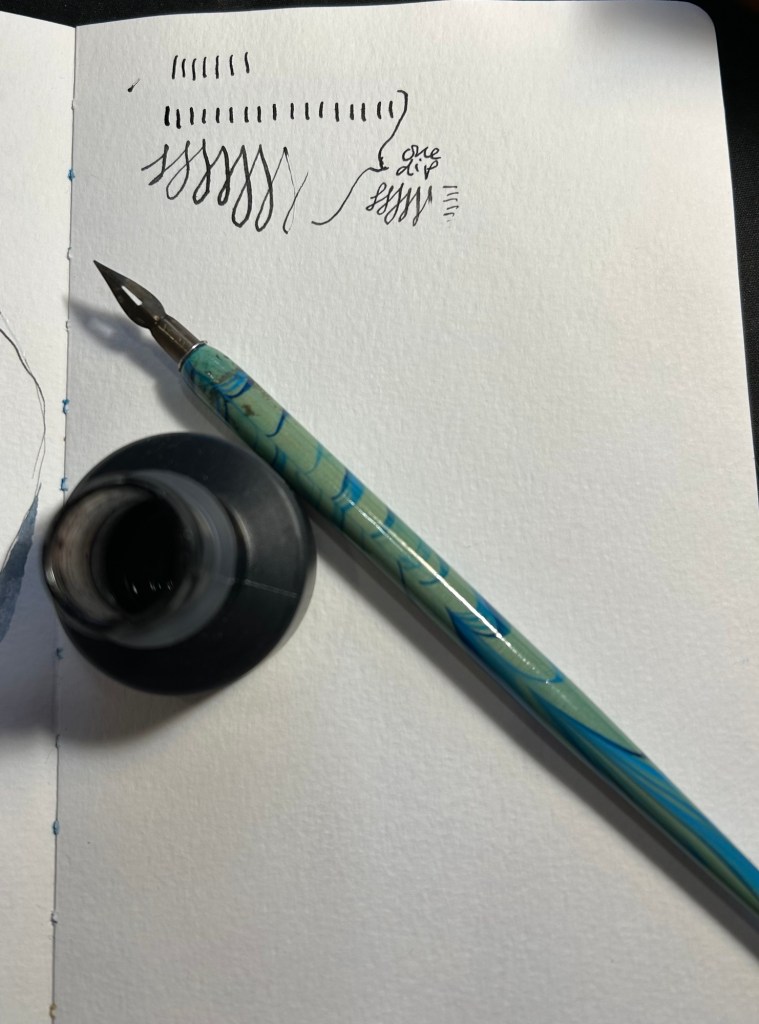
I took one dip and tested out how much ink it holds. It’s quite a lot:
I decided to use it on a Moleskine Watercolour sketchbook. The paper isn’t ideal for dip pens (it’s not smooth and the properties that make it watercolour friendly mean that the ink will spread and feather no matter what), but I wanted to use it with watercolours. As in this case the line sketch wasn’t crucial to me (i.e. it didn’t need to be particularly accurate), I decided to accept some level of feathering and spread for a decent watercolour wash.
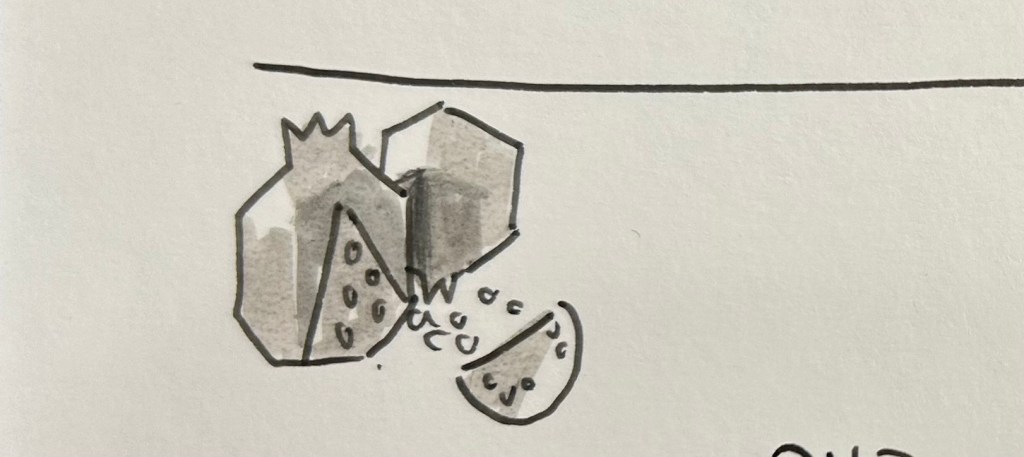
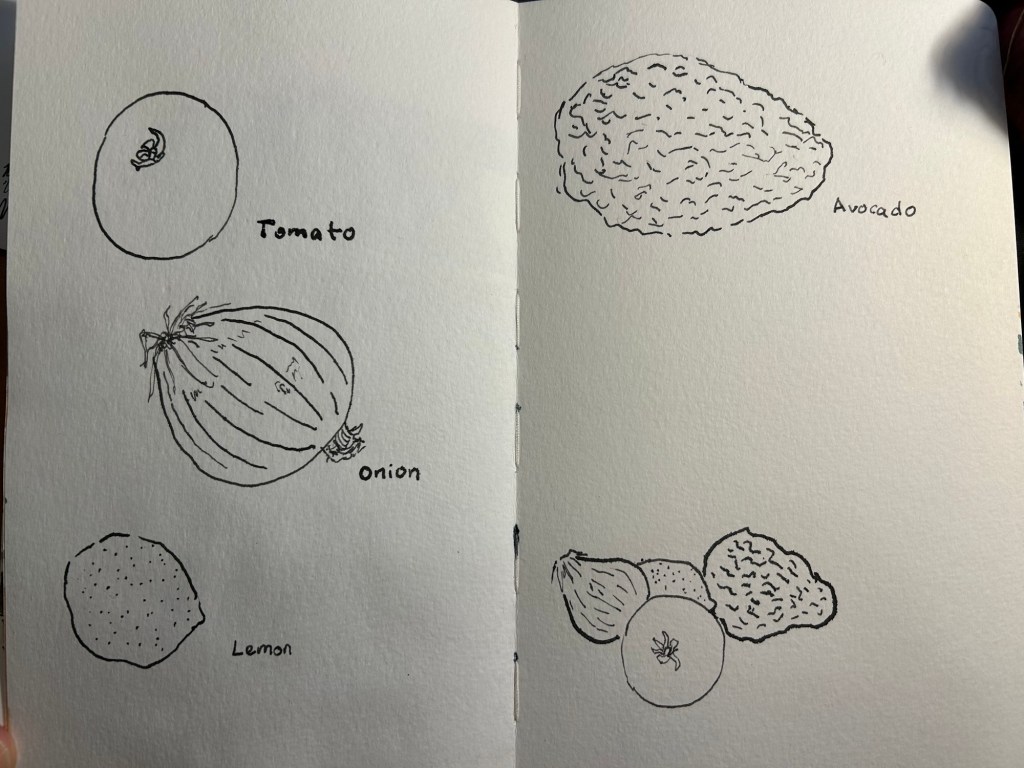
Here’s the ink sketch:
A closeup on the onion sketch shows how much line variation you can get from this kind of nib, just how expressive these nibs are, and some of the feathering and spread that I talked about earlier:
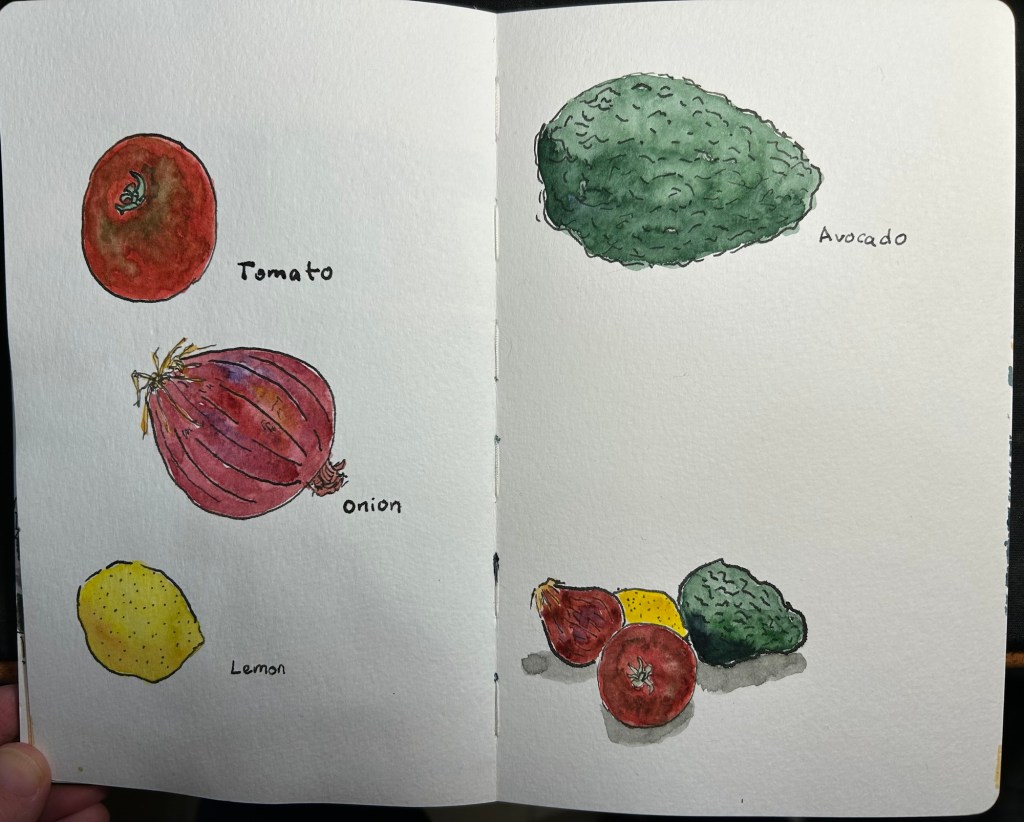
Watercolour brings these sketches to life, and makes the ink compromises worth it:
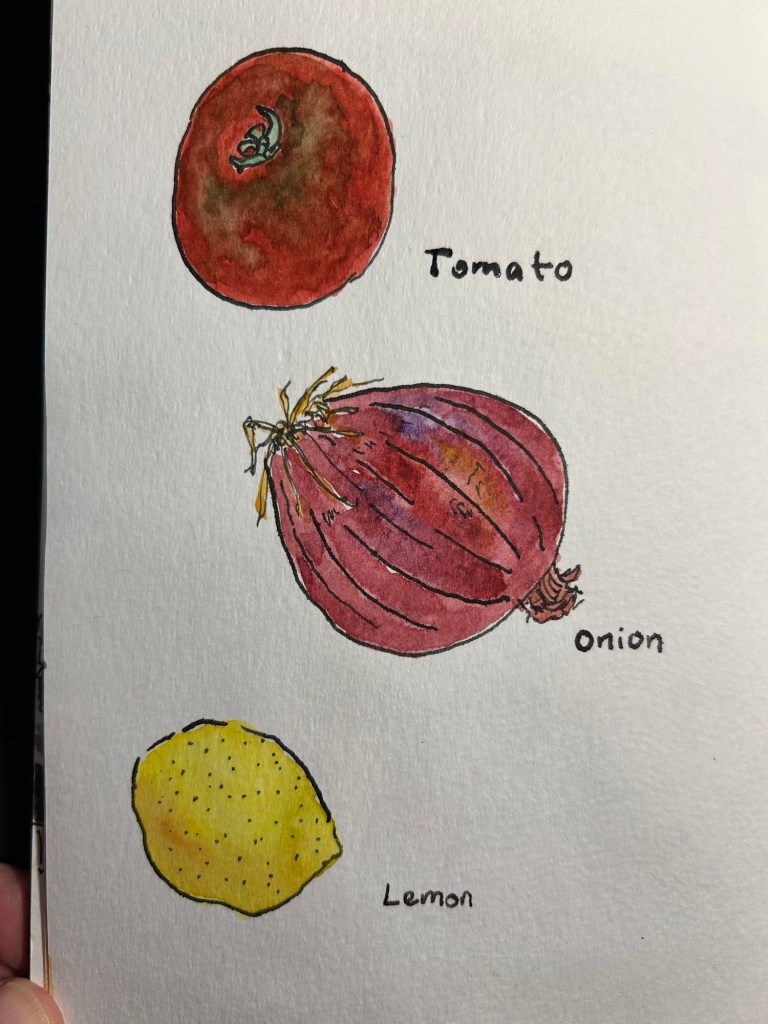
A closeup on the sketches:
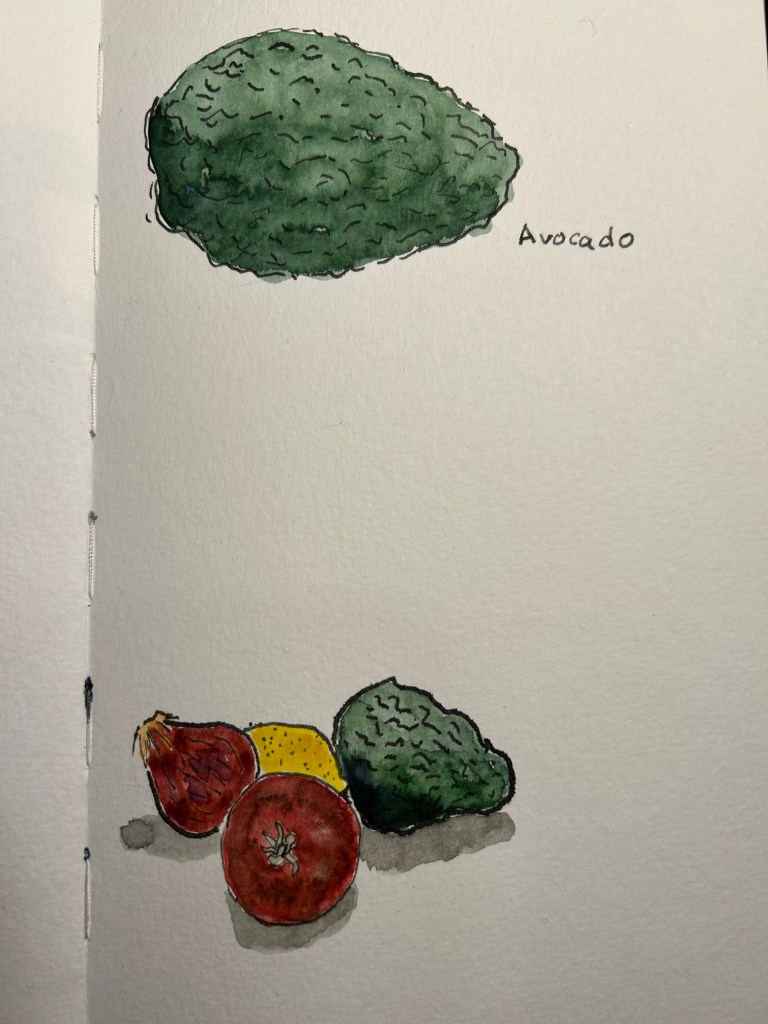
The second page:
The group thumbnail:
There are a few things that you need to remember when combining dip pens and watercolours:
You must let the ink completely dry or you’ll have a ruined drawing, and potentially a ruined brush (if this happens immediately wash your brush well, as India ink will destroy it if left to dry).
The more cotton content in your paper the better the watercolour washes will be, and the worse the India ink will behave. I wouldn’t go over 25% cotton content.
The rougher the paper the better the watercolour washes will be, and the worse the ink sketches will be.
Hot pressed watercolour paper will give you washes with more sharp edges and hard transitions, but will be best for the India ink in terms of smoothness.
Mapping nibs provide less dramatic lines, but they also lay down less ink and so the ink will dry faster and spread less. On the other hand they will snag more easily on rougher watercolour paper.
Have you tried combining the two mediums? If so, let me know how it went.
It’s been a while since I used my dip pens, and since I had a project in mind for them, I thought I’d document parts of it here.
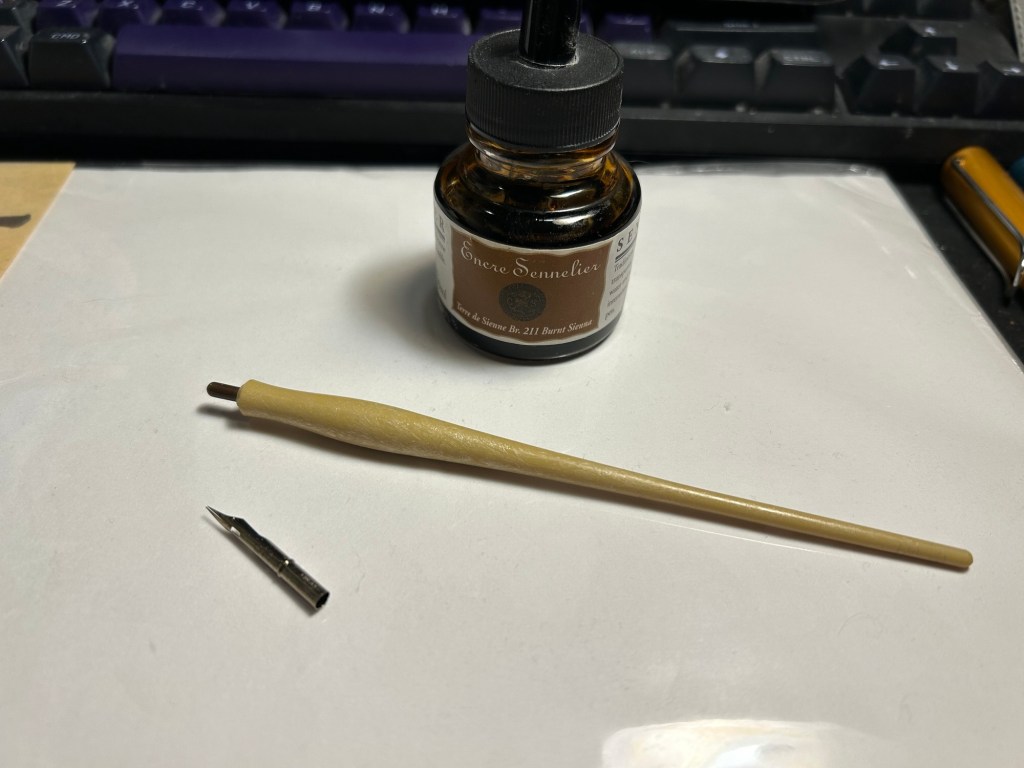
I was looking to draw a map, part of a series of maps for a D&D game. Since I was trying to get a certain look to these maps, I pulled out a mapping nib and a mapping nib holder, and some Sennelier Sepia ink.
The ink is shellac based and meant to be used in dip pens only. If you use it in a fountain pen it will destroy it upon first use. You only need to see how sticky these inks are once to understand that, but most of them helpfully provide warnings on the bottle.
The nib is a Leonardt 801 mapping nib, made in England by the British company Manuscript and purchased, together with the mapping nib holder at Cornelissen & Son in London. They have the largest and best variety of dip nib supplies that I’ve ever seen, and are used by many illustrators and cartoonists. The beauty of dip nibs, however, is that they’re pretty easily and cheaply obtainable. Speedball sells a kit that includes a wide variety of nibs, including a mapping nib, and two holders (a standard one and a mapping one, known as a crow quill).
What’s the deal with a mapping nib? It’s a small, round nib with an end that’s actually a cylinder, and you pop it onto the little peg at the top of the holder. Mapping nibs allow for very thin lines, and yet also a good line variety as the tines are sensitive to pressure.
If you’ve used a fountain pen before and then try to use a dip pen, you’ll likely be surprised by several things. The first is that most dip pen nibs, and mapping nibs in particular, are very sensitive to pressure. The slightest push down will give you more line variation that you’ll get from even the most flexible of flexible fountain pens. The second is that there’s no tipping material. That means more feedback from the page, and that you need to be aware of the directionality of the nib if you don’t want it to snag and spray ink everywhere. This is also why the paper you want to use will be smooth. Smooth surface cartridge paper is your friend.
India ink (the shellac based ink used for dip pens) lays on top of the paper and retains a level of gloss and a dimensionality that you just don’t get with fountain pen paper. You can feel the ink lines with your fingers once the ink dries. The ink dries quickly, and is sticky and staining when wet, so beware of nice clothes and wash your hands well once you’re done.
You can see the line variation and shiny properties of the ink.
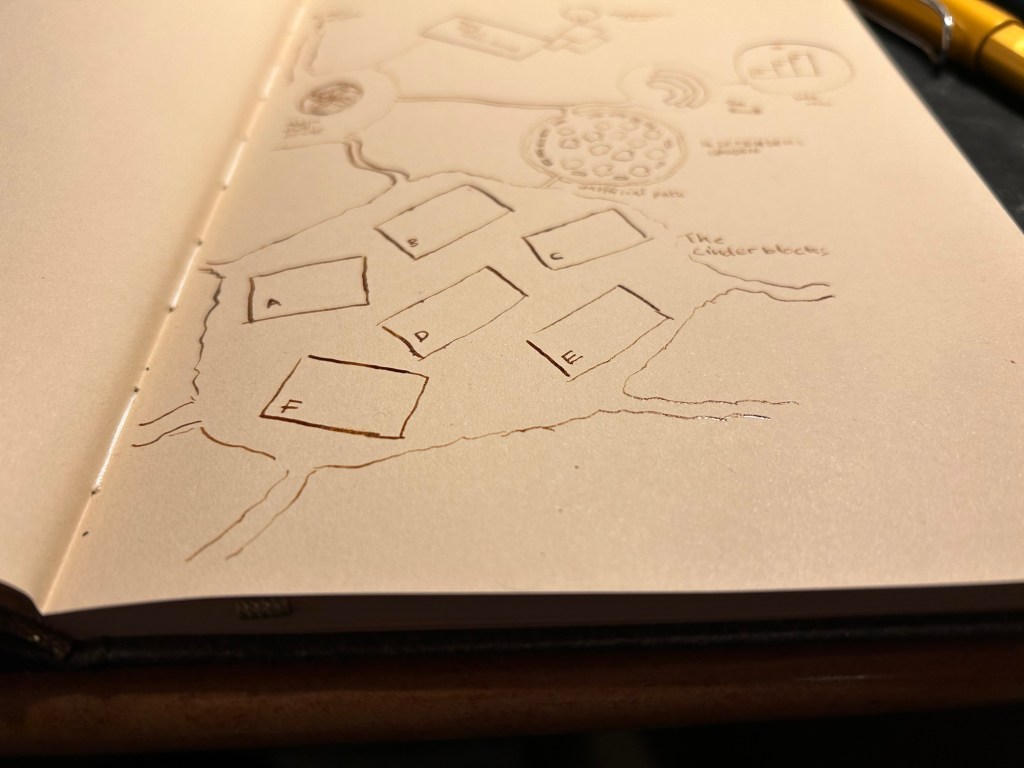
The nib itself needs to be prepared before you use it for the first time. New nibs are coated in oil and sometimes with wax before being packaged. This prevents them from rusting, and helps them not stick to each other too much as they’re being packaged. If you use a new nib without preparing it, you’ll be disappointed. It will carry little to no ink, and you’ll find yourself dipping the nib again and again. The map above was made with 4-5 dips only, using a new nib, but one that I prepared.
How do you prepare a dip nib? The simplest and safest way (no, don’t take a lighter to it) is as follows: gently clean the nib with water and dish soap (you can use a soft toothbrush if you want, but it doesn’t really require scrubbing) and then put it in cup with boiling water for 1-2 minutes. Then fish the nib out and dry it very, very, very well with a paper towel. You don’t want to air dry the nib at any point or it will rust.
You can see that the ink is raised above the paper and retains its shininess
You can use fountain pen ink with dip pens, but I don’t recommend it. Fountain pen ink is thin and water based, so it doesn’t cling to the nib like India inks. You’ll be dipping a lot more often, and your results won’t be as good. If you plan on using a dip pen to test out fountain pen inks, know that your test will only show the colour properties of the ink but not its flow (wet/dry). Also don’t use a mapping nib for that – mapping nibs are best used for small sketches, maps, things that require very thin lines and some line variation.
When I work with a dipping nib I keep the nib constantly wet with ink (not water!), and immediately when I’m done I either wash the ink from the nib and dry it very well, or I wipe the ink off with a cotton rag if I just plan to take a short break. Ink left to dry on the nib may clog it (particularly with mapping nibs), and soaking a nib in water will cause it to rust.
You may find dip nibs in flea markets for very cheap, usually in a pile in a little box. Check if they aren’t rusted (don’t buy rusted nibs), and then clean them as you would a new nib (water, soap, heat).
I’ll be going over various kinds of India inks and various kinds of nibs in future posts, but in the meanwhile if there’s anything that interests you in dip nibs let me know in the comments.
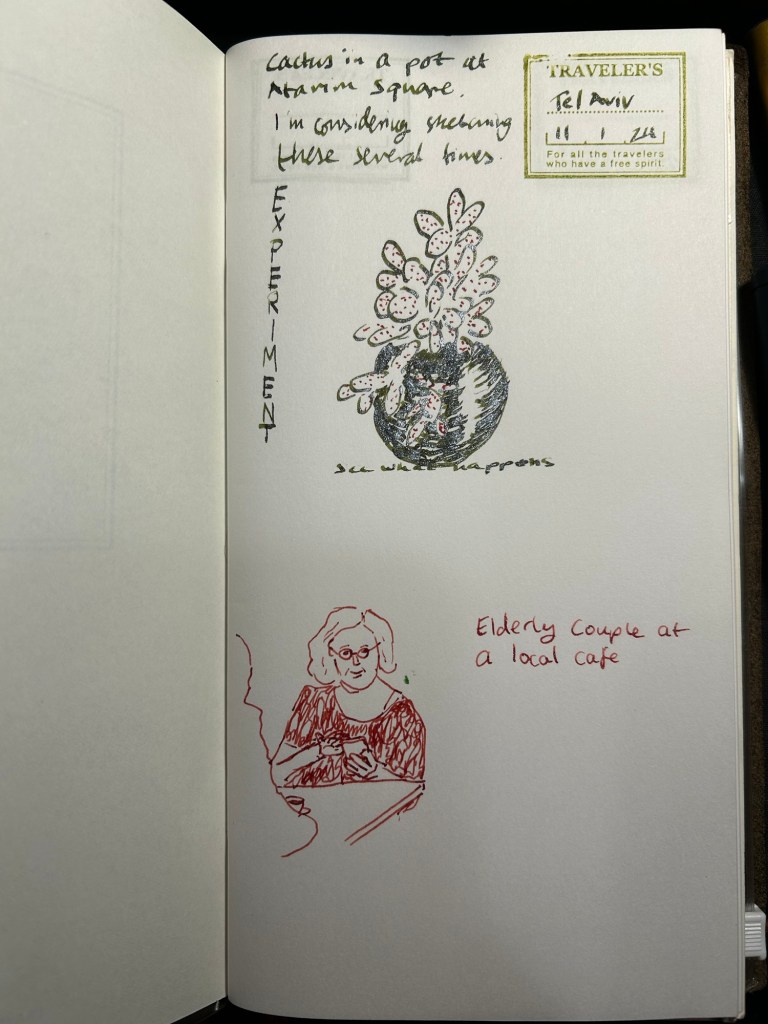
I’m still working my way through the Inkvent inks (9 pens left to write dry), and I’m trying to sketch more even on busy weeks. So I dusted off an old Traveler’s Notebook that I set up years ago and didn’t fill, and I started playing with fountain pens.